Element References
Use Element references in the Model Viewer to link model elements to relevant document versions stored in the CDE.
For example, you can link an equipment element to its technical documentation, connect an element to supporting evidence, or link several selected elements to the same document version.
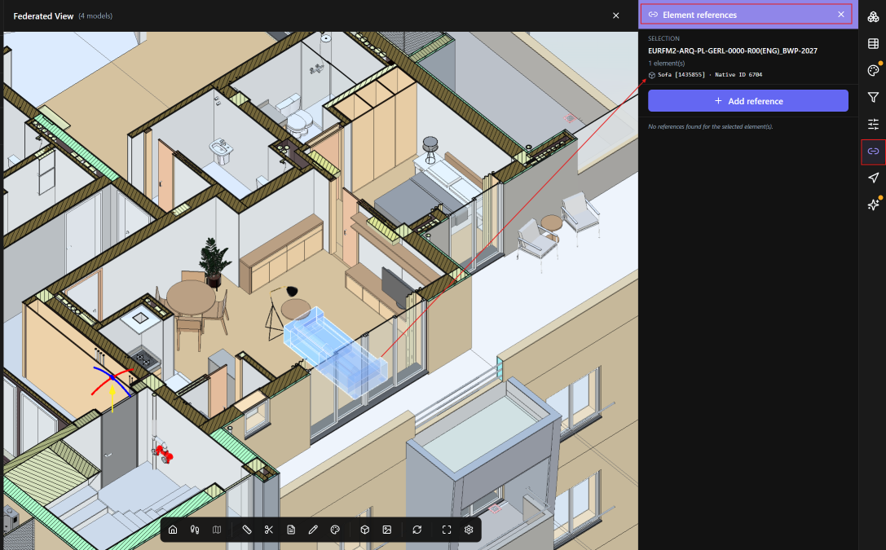
Before you start
Make sure that:
- You can access the model in the Model Viewer. Your access to the model depends on your permissions for the CDE folder where the model is stored.
- You have at least Read permission for References in Workplace Settings > Project Permissions to open the panel and view existing references.
- You have Total permission for References in Workplace Settings > Project Permissions to add or remove references.
Opening Element references
- Open the Model Viewer.
- Select one or more elements in the 3D model.
- On the right-side toolbar, select Element references.
The panel shows information about the selected element and its existing references.
If no element is selected, the panel prompts you to select one or more elements in the 3D viewer.
Adding a reference
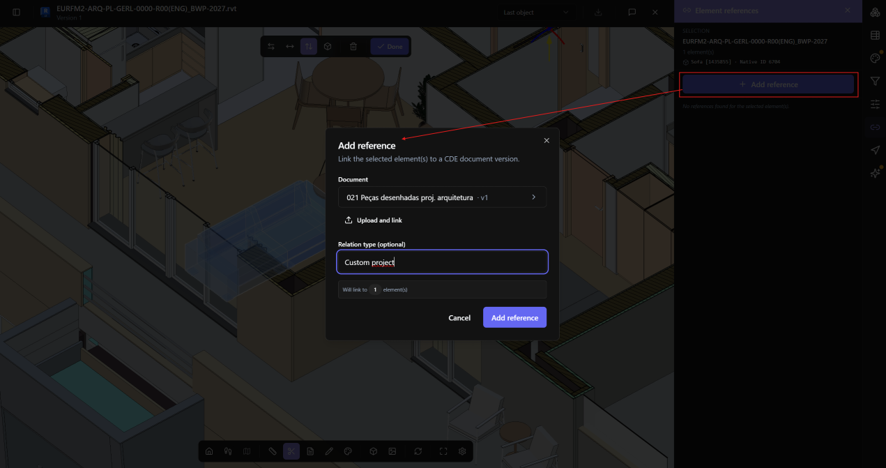
You can link one or more selected model elements to a specific version of a document stored in the CDE.
- Select one or more elements in the 3D Model Viewer.
- Open Element references.
- Select Add reference.
- Under Document, select the document you want to reference from the CDE.
- Select the required document version.
- Optionally, enter a Relation type to describe the relationship between the elements and the document.
- Select Add reference.
BIMWorkplace links the selected document version to each selected element.
Uploading and linking a document
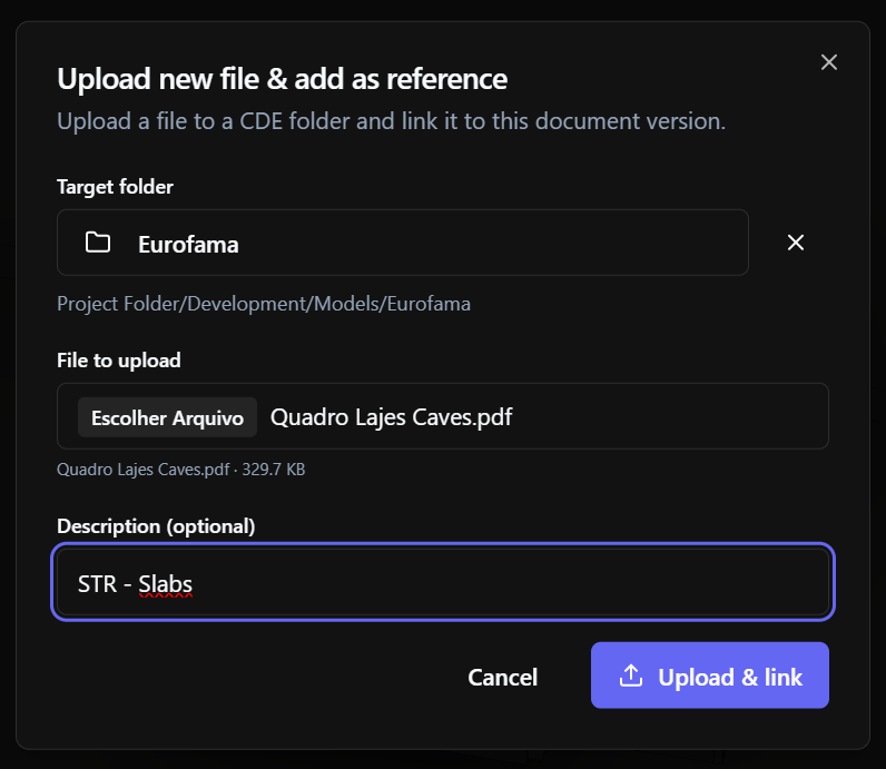
If the document is not yet available in the CDE, you can upload it while adding the reference.
- In the Add reference dialog, select Upload and link.
- Select the CDE folder where you want to save the document.
- Select the file from your computer.
- Optionally, enter a description.
- Complete the upload.
After the upload is complete, BIMWorkplace returns to the Add reference dialog with the uploaded document selected.
Complete the reference by selecting the required options and selecting Add reference.
Viewing existing references
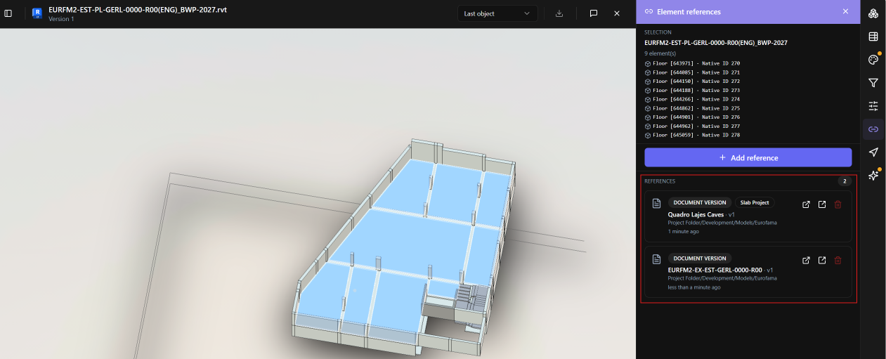
Select an element and open Element references to view the document versions linked to it.
For each reference, the panel can show:
- the document name and version;
- its CDE folder;
- the Relation type, when provided;
- when the reference was created.
Use Open document to open the referenced document in the CDE. You can also open it in a new browser tab.
Removing a reference
You need Total permission for References to remove an element reference.
- Select the element in the Model Viewer.
- Open Element references.
- Find the reference you want to remove.
- Select Remove reference (trash icon).
The relationship between the model element and that document version is removed. The document itself is not deleted from the CDE.
Note: When multiple elements are selected, new references are linked to all selected elements. However, the list of existing references is based on the first selected element, and removing a reference removes it from the first selected element only. To review or remove references for a specific element, select that element individually.
Troubleshooting
Element references is not available
Check that your Project Role has at least Read permission for References.
Also make sure you have access to the model through the CDE folder where it is stored.
Add reference is not available
You need Total permission for References to add references.
Este artigo foi útil?