Vorbereitung von Autodesk Forma für die BIMWorkplace Integration
Bevor Sie Autodesk Forma mit BIMWorkplace verbinden, muss die BIMWorkplace Integration zum Autodesk Hub hinzugefügt werden, der die Projekte enthält, die Sie verwenden möchten.
Diese Konfiguration wird in Autodesk Forma durchgeführt und muss nur für den relevanten Autodesk Hub abgeschlossen werden.
Bevor Sie beginnen
Stellen Sie sicher, dass Sie Zugriff auf die Verwaltungseinstellungen für den Autodesk Hub haben, den Sie verbinden möchten.
Sie benötigen außerdem die Autodesk Platform Services Client ID für die BIMWorkplace Integration. Um die Client ID zu erhalten, kontaktieren Sie info@bimworkplace.com.
Hinzufügen von BIMWorkplace als benutzerdefinierte Integration
-
Melden Sie sich bei Autodesk Forma an.
-
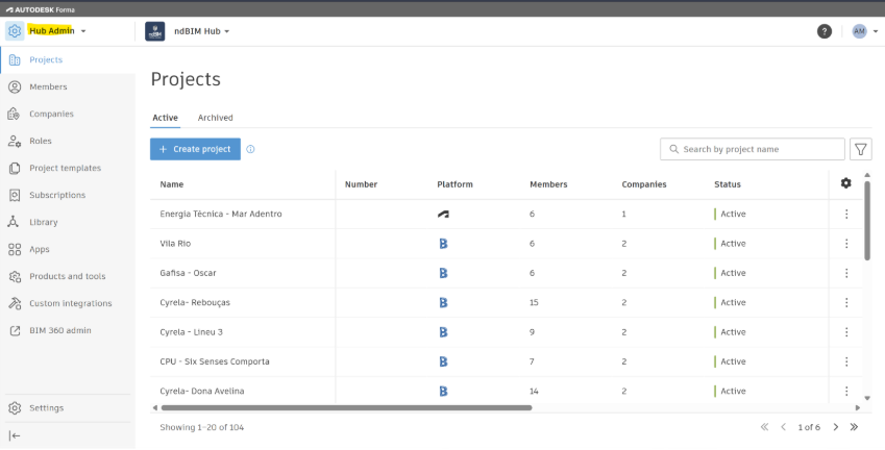
Öffnen Sie Hub Admin.
-
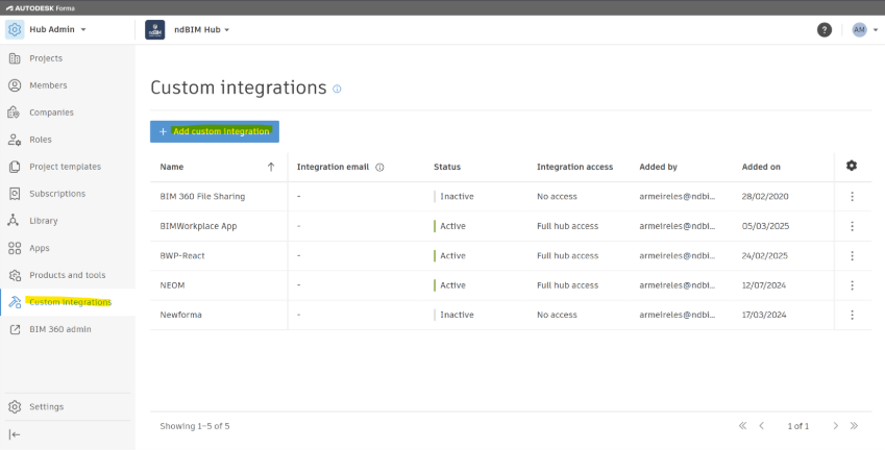
Wählen Sie Custom Integrations.
-
Wählen Sie Add custom integration.
-
Unter Autodesk Platform Services Client ID, geben Sie die von BIMWorkplace bereitgestellte Client ID ein.
-
Unter Custom Integration name, geben Sie BIMWorkplace App ein.
-
Fügen Sie die benutzerdefinierte Integration hinzu.
BIMWorkplace ist nun als benutzerdefinierte Integration für den Autodesk Hub registriert.
Nächste Schritte
Nachdem Sie den Autodesk Hub vorbereitet haben:
- Verbinden Sie Ihr Autodesk Konto mit BIMWorkplace. Siehe Connecting BIMWorkplace to Autodesk Forma.
- Verbinden Sie das Autodesk Forma Projekt mit Ihrem BIMWorkplace Projekt. Siehe Connecting a Project to Autodesk Forma.
Was this article helpful?