Uploading and Configuring Sheets for SiteWalk
Before creating SiteWalk captures, project information needs to be prepared inside BIMWorkplace.
The preparation workflow includes:
Uploading the floor plan.
Uploading BIM models.
Federating the required models.
Georeferencing the floor plan with the BIM model.
Uploading a Floor Plan
SiteWalk uses floor plans as the reference environment for positioning 360° videos.
To upload a floor plan:
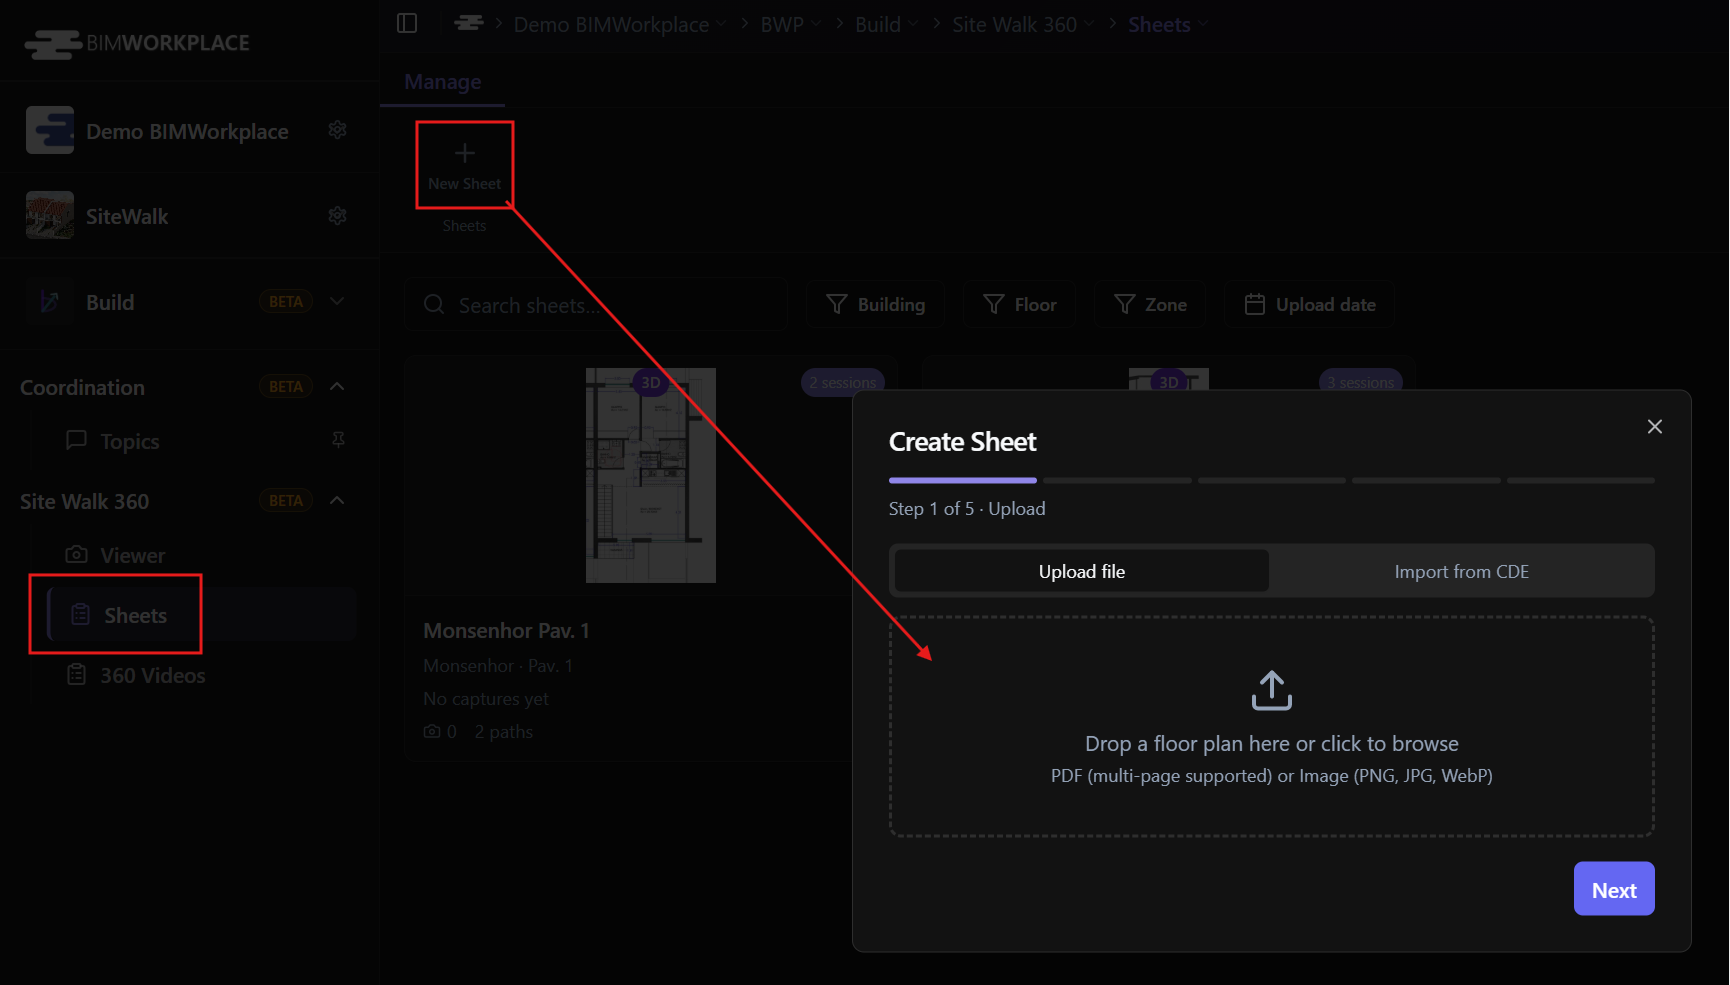
Open the Sheets page within the Build module.
Select the New Sheet button in the Ribbon.
Upload the file by dragging it into the upload area or clicking to browse.
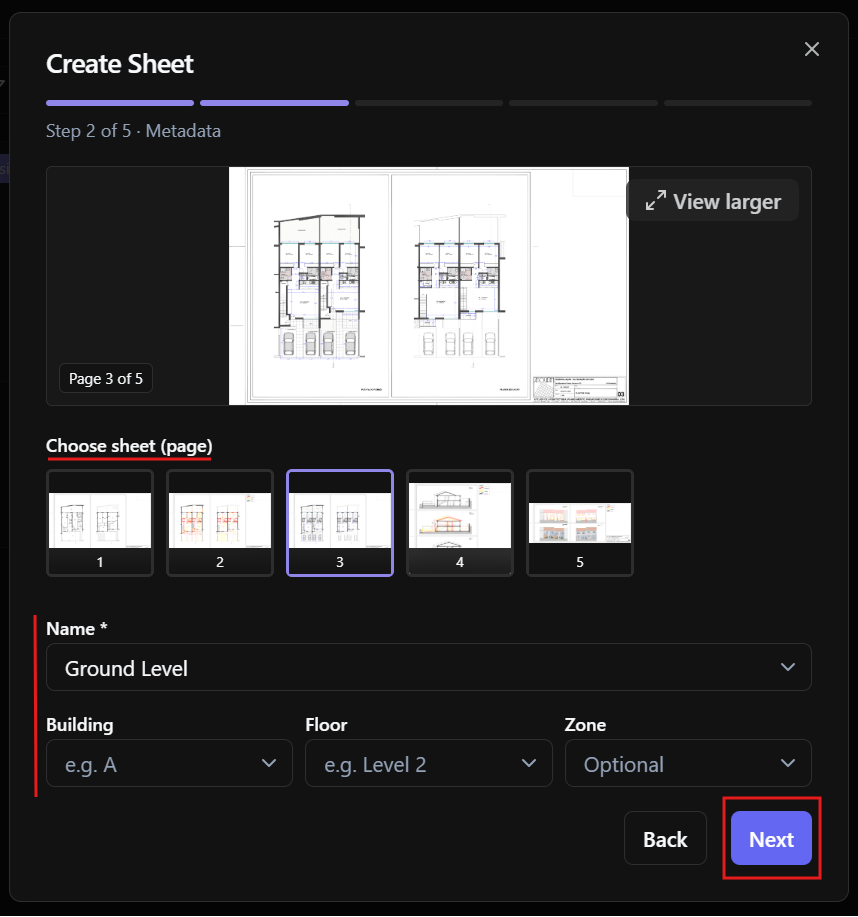
4. If using a multi-page PDF, select the desired page.
5. If required, rename the floor plan and add Building, Floor, and Zone information to improve organization and identification.
6. Click Next.
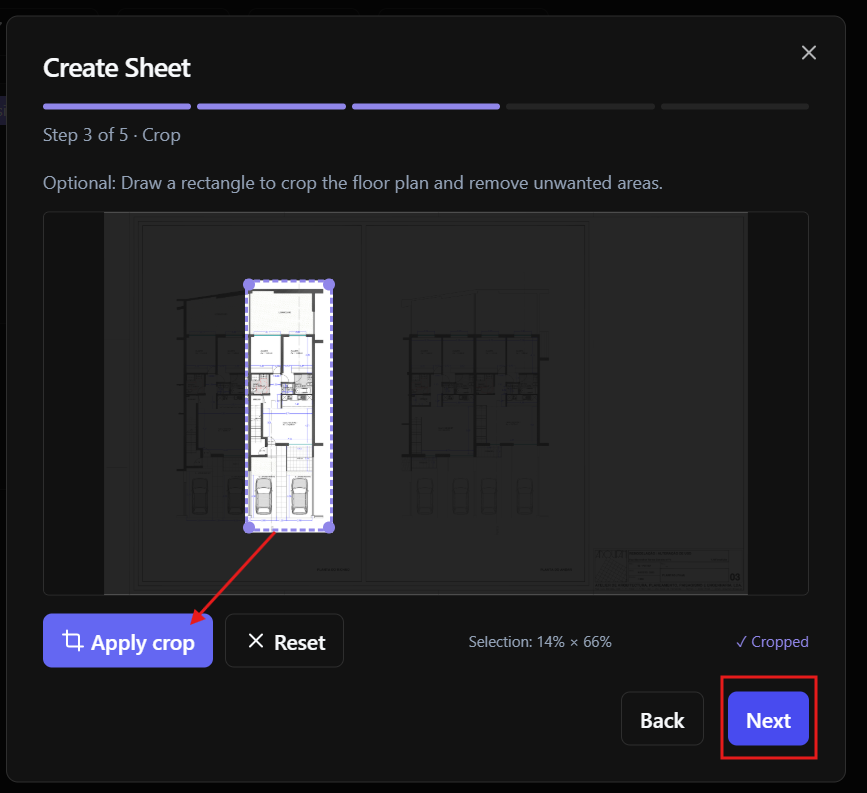
7. Select the area of the floor plan that should be displayed.
This step helps simplify visualization, especially when navigating using the mini-map.
8. Click Apply Crop, then click Next.
9. If needed, adjust the floor plan orientation and click Next.
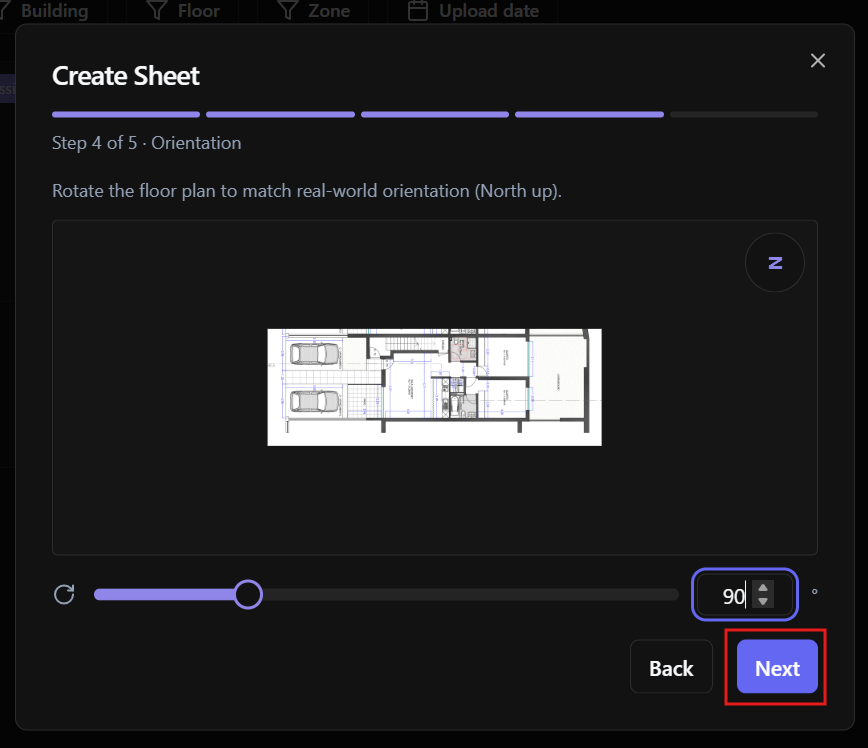
[SCREENSHOT PLACEHOLDER: Floor plan rotation/orientation adjustment]
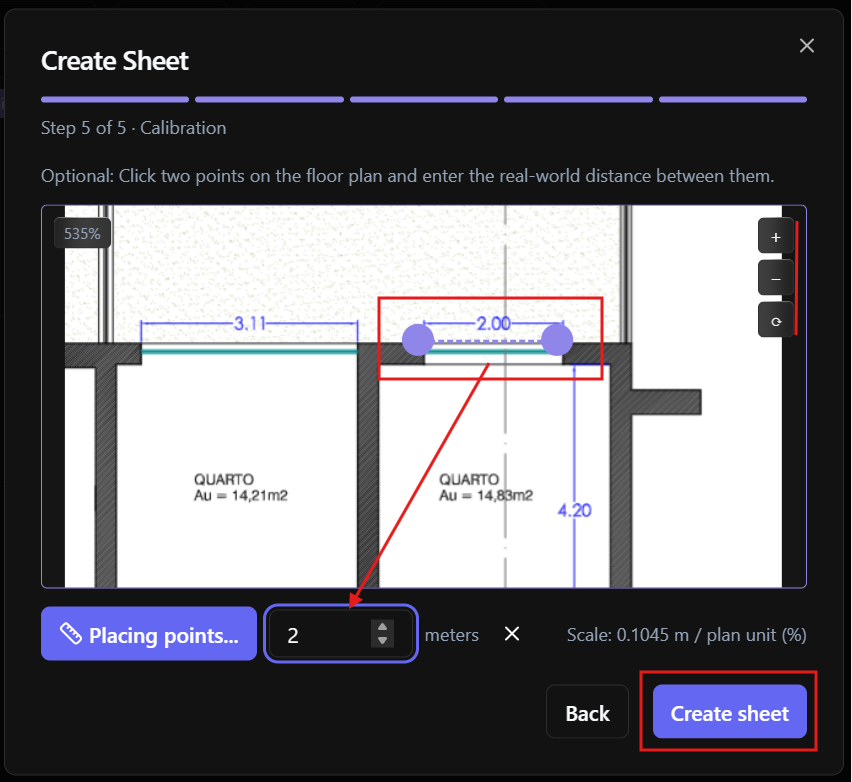
Calibrate the floor plan by selecting two points with a known distance between them.
Use the zoom controls or mouse scroll to accurately select the points.
11. Click Create Sheet to complete the upload process.
The floor plan is now available for SiteWalk positioning and BIM model alignment.
Was this article helpful?