Groups
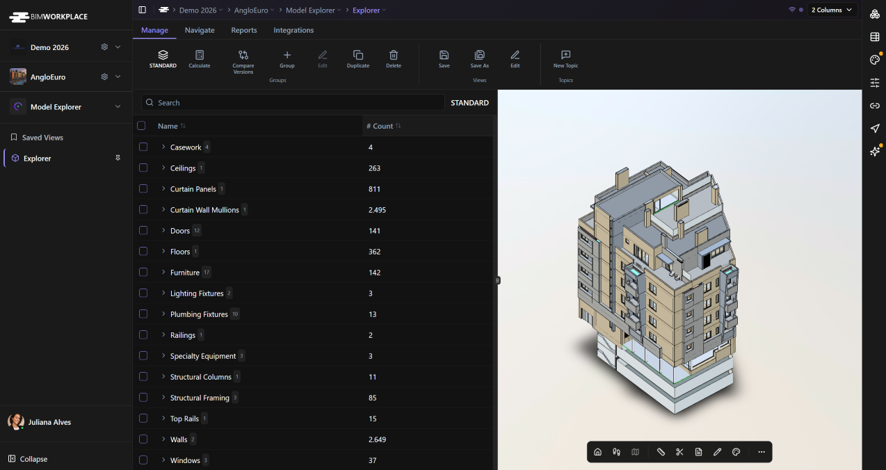
Use Groups in Explorer to define how model data is organized in the table.
A Group determines:
- which properties are used to create the table hierarchy;
- the order of the hierarchy levels;
- which additional properties are displayed as columns;
- how numerical values are calculated at each level.
For example, you can create a Group that organizes model elements by Category > Family > Type and displays quantities, areas, or other model properties as additional columns.
After selecting a Group, use Calculate to generate or update the Explorer table using its configuration.
Before you start
Make sure that:
- The models you want to analyze are federated and active in the project.
- Model data has been extracted.
- You have the required permission to manage Explorer Groups.
Explorer can use extracted data from:
- IFC or Revit models with extracted data available.
- Note: IFC data is extracted automatically on file upload. Revit models must be sent through the plugin or have their data extracted.
- Navisworks NWC and NWD models uploaded through the BIMWorkplace Plugin.
The properties available when configuring a Group depend on the data available in the active models and model versions.
For an overview of how model data is used in Explorer, see Explorer.
The Standard Group
Each project includes a Standard Group that provides the default Explorer data organization.
The Standard Group cannot be edited or deleted.
To organize the table differently, create a new Group or select another existing Group.
Creating a Group
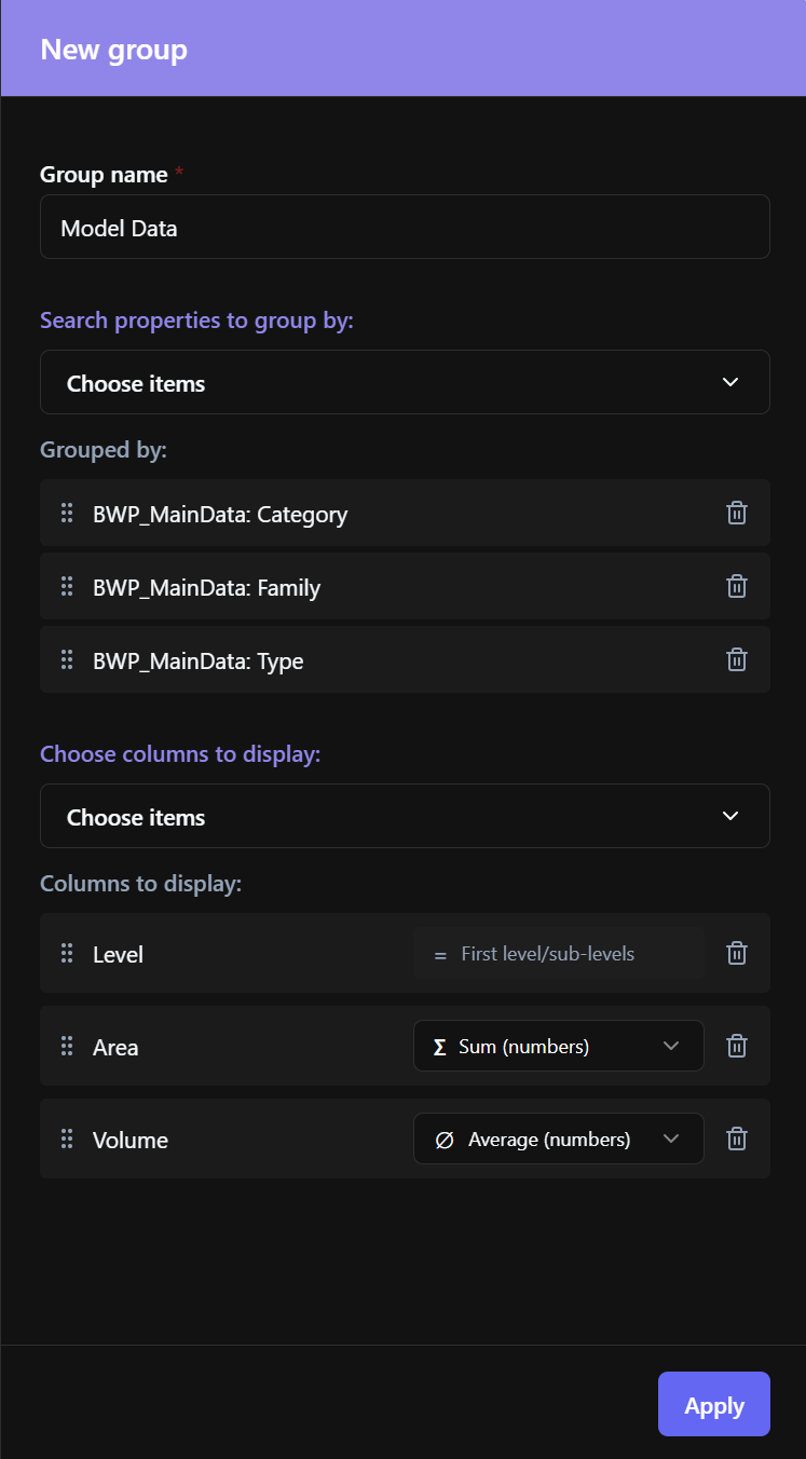
- In the Manage tab, under Groups, click Group.
- Enter a Group name.
- Select the Properties to group by from the dropdown.
- Arrange the selected properties in the required order using the drag icon on the left.
- Under Columns to display, select any additional properties you want to display in the table and arrange them in the desired order.
- Configure calculations for numerical columns when required.
- Click Apply.
Defining the hierarchy
The Properties to group by determine how elements are organized.
Their order defines the hierarchy from the highest to the lowest level.
For example:
Category > Family > Type
Changing the order changes how the data is grouped in the Explorer table.
A Group can contain up to 10 hierarchy levels.
A property used under Properties to group by cannot also be used as a display column in the same Group.
Choosing columns
Use Columns to display to add information that should appear alongside the hierarchy.
For numerical properties, you can define how values are calculated:
- Sum — adds the values.
- Average — calculates the average value.
- Maximum — displays the highest value.
- Minimum — displays the lowest value.
- Count — counts non-empty values.
- First level/sub-levels — displays the value without applying a numerical calculation.
Non-numerical properties do not support mathematical calculations.
Applying a Group to the table
Creating or selecting a Group does not by itself recalculate the Explorer table.
To apply a Group:
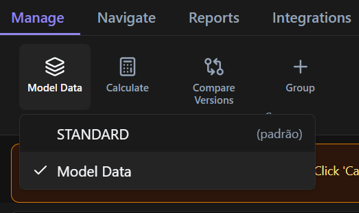
- In the Manage tab, click the button that shows the current Group name.
- Select the Group you want to use from the dropdown.
- Click Calculate.
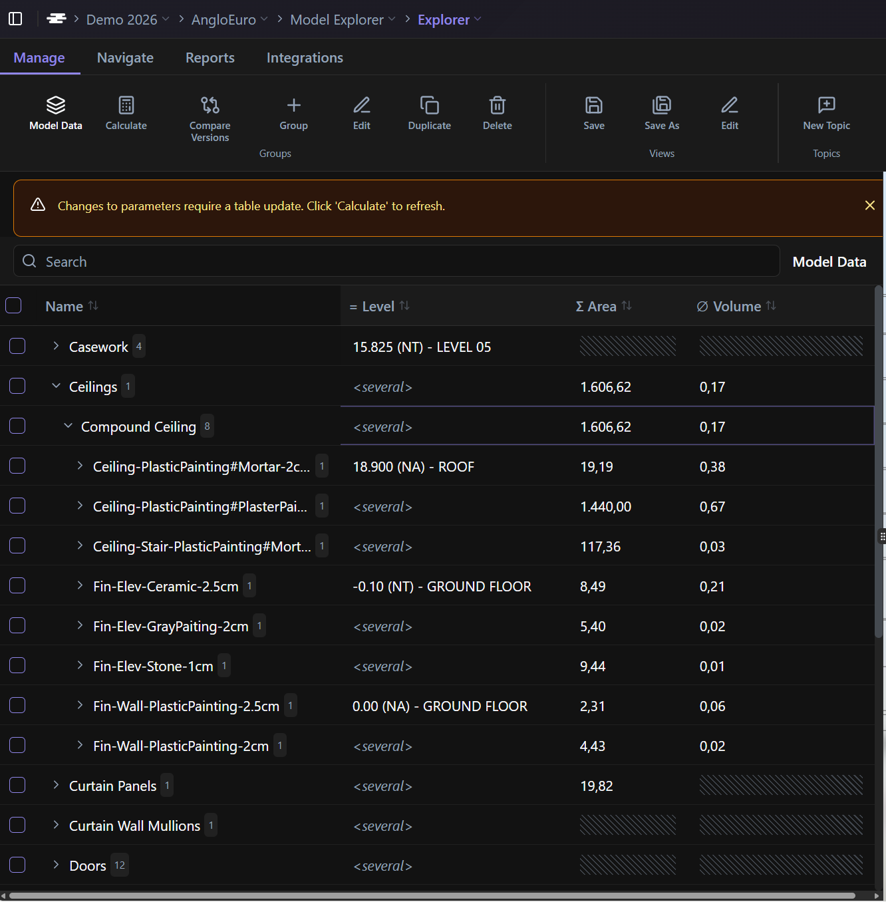
Explorer processes the selected Group and updates the table according to its hierarchy, columns, and the current Explorer context.
If relevant model data changes, Explorer may indicate that the table needs to be recalculated. Click Calculate again to update it.
Editing a Group
To change an existing Group:
- Select the Group.
- Click Edit.
- Change the name, hierarchy, columns, or calculations as required.
- Click Apply.
- Click Calculate to update the table using the new configuration.
The Standard Group cannot be edited.
Editing a Group can affect Saved Views that use that Group. See Saved Views for more information about saving and reusing Explorer configurations.
Duplicating a Group
Use Duplicate when you want to create a new Group based on an existing configuration.
- Select the Group you want to copy.
- Click Duplicate.
Explorer creates a copy containing the same hierarchy and column configuration. You can then edit the new Group without changing the original.
Deleting a Group
- Select the Group.
- Click Delete.
- Confirm the deletion.
A Group cannot be deleted when:
- it is the Standard Group; or
- it is associated with existing Saved Views.
If the Group is used by Saved Views, remove or update those dependencies before deleting the Group.
See Saved Views for more information about managing Explorer views.
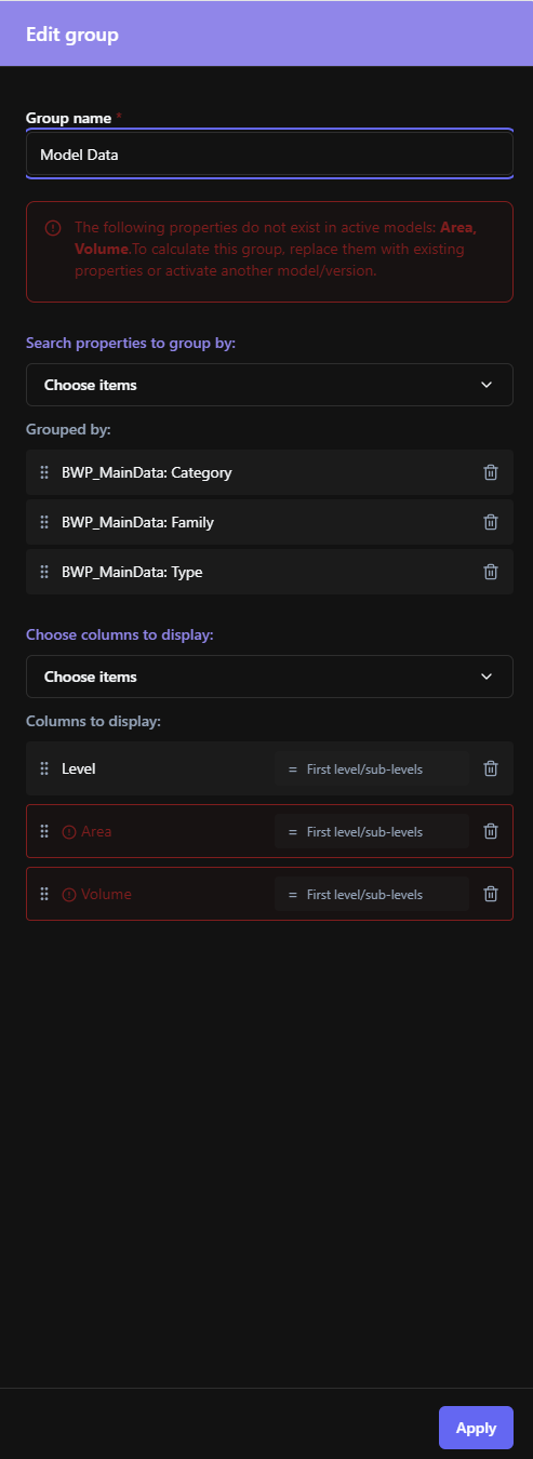
When a Group contains unavailable properties
A Group may reference a property that is no longer available in the currently active models or model versions.
When this happens, Explorer identifies the unavailable properties in the Group configuration.
To calculate the Group, replace the unavailable properties with properties available in the active models, or activate a model or version that contains the required properties.
Related features
Groups work together with other Explorer features:
- Saved Views — save and reuse an Explorer configuration, including its Group.
For a general introduction to the module, see Explorer.
Was this article helpful?