Federated Models
Overview
Federated Models combine multiple discipline models into a single coordinated environment that can be used across BIMWorkplace.
A federated model does not create copies of the original files. Instead, it references the source models stored in the project and makes them available for coordination, visualization, and analysis.
Federated models can be used in the following modules:
Design for model coordination, topics, viewpoints, and markups.
Explorer for model navigation, filtering, data exploration, and property analysis.
Build for model-based construction workflows.
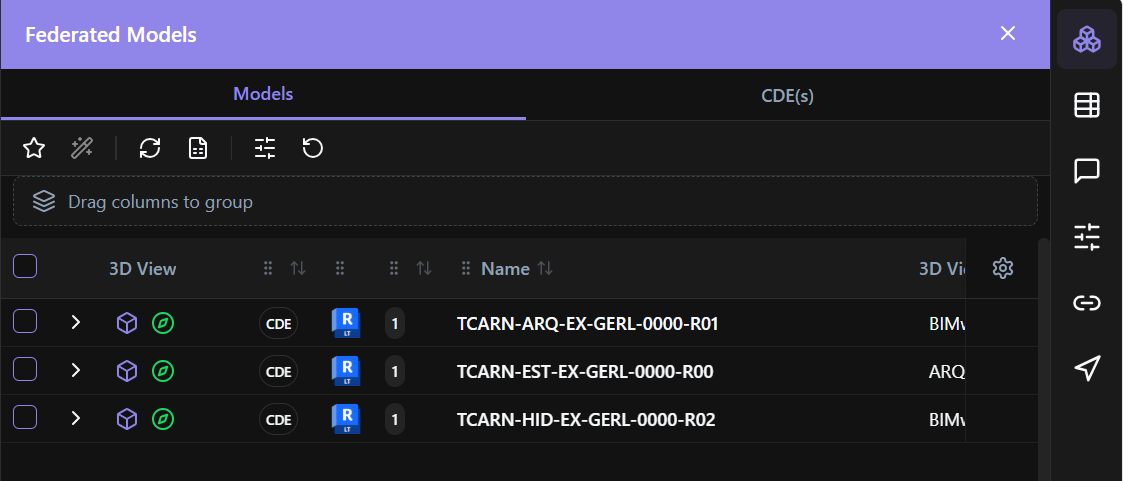
Creating a federation
Models can be added to a federation from two locations:
· The CDE
· The Federated Models side panel available in the Design, Explorer, and Build modules.
The federated model configuration is shared across the platform. However, each module manages its own active model selection.
This means that:
· Adding or removing a model from the federation affects the available models across BIMWorkplace.
· Activating or deactivating models in one module does not affect the active models in another module.
This allows each module to use the model combination required for its specific workflow.
Federating a model
Option 1: From the CDE
To add a model to a federation from the CDE:
Open the CDE.
Browse the folder structure and select one or more model files.
In the Design tab of the Ribbon, click Federate.
To remove a model from the federation:
Select the federated model.
Click Unfederate.

Federated models are identified with a paperclip icon.
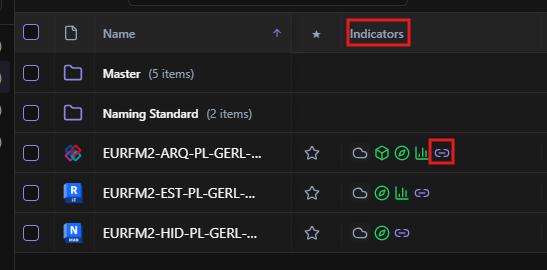
Option 2: From the Federated Models panel
Models can also be added directly from the Federated Models side panel available in the Design, Explorer, and Build modules.
To federate a model:
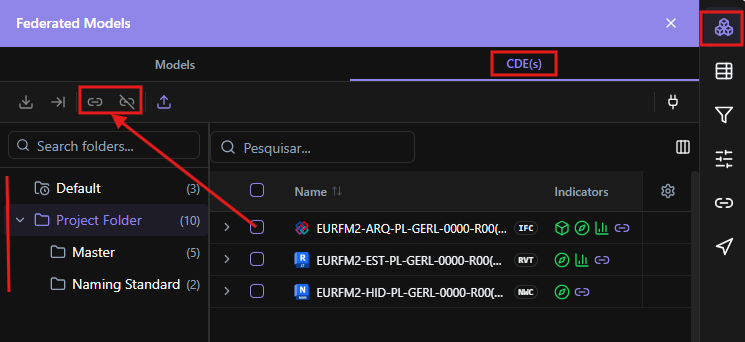
Open the Federated Models panel.
Select CDE.
Browse the CDE folder structure.
Click the paperclip icon next to the model you want to add.
The selected model is immediately added to the federation and becomes available for use.
To remove a model:
Select the model in the Federated Models panel.
Click the crossed paperclip icon.
Updating model versions
When a new version of a source model is uploaded to the project, the federated model can be updated to use the required version.
To update a model version:
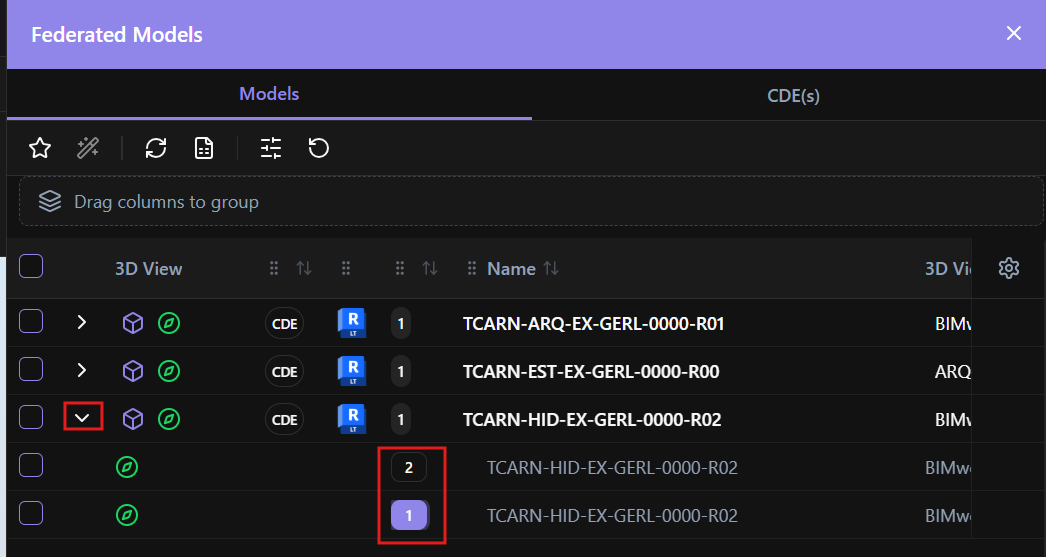
Open the Federated Models panel.
Click the arrow next to the corresponding model.
Select the required version from the available versions list by clicking on the version number.
You can switch between available versions at any time.
This allows teams to maintain version history while ensuring that each module uses the appropriate model information.
Removing models from a federation
Removing a model from a federation only changes the federation configuration. It does not delete the original file from the project.
The source model remains available in the CDE and can be added to a federation again when required.
Best practices
Keep source models updated before refreshing the federation.
Use consistent naming conventions for models to simplify management.
Remove obsolete models from federations to avoid unnecessary clutter.
Update federated model versions after uploading new source model versions.
Maintain clear model ownership and version control within the CDE.
Was this article helpful?