Filter Models
Filters allow you to control the visibility of elements in the federated viewer.
They help you isolate specific portions of the model, review elements by category or level, apply saved visibility rules, and focus the viewer on the information needed for coordination, analysis, or presentation.
To open the filter panel, click the Model Filters button on the right side of the screen.
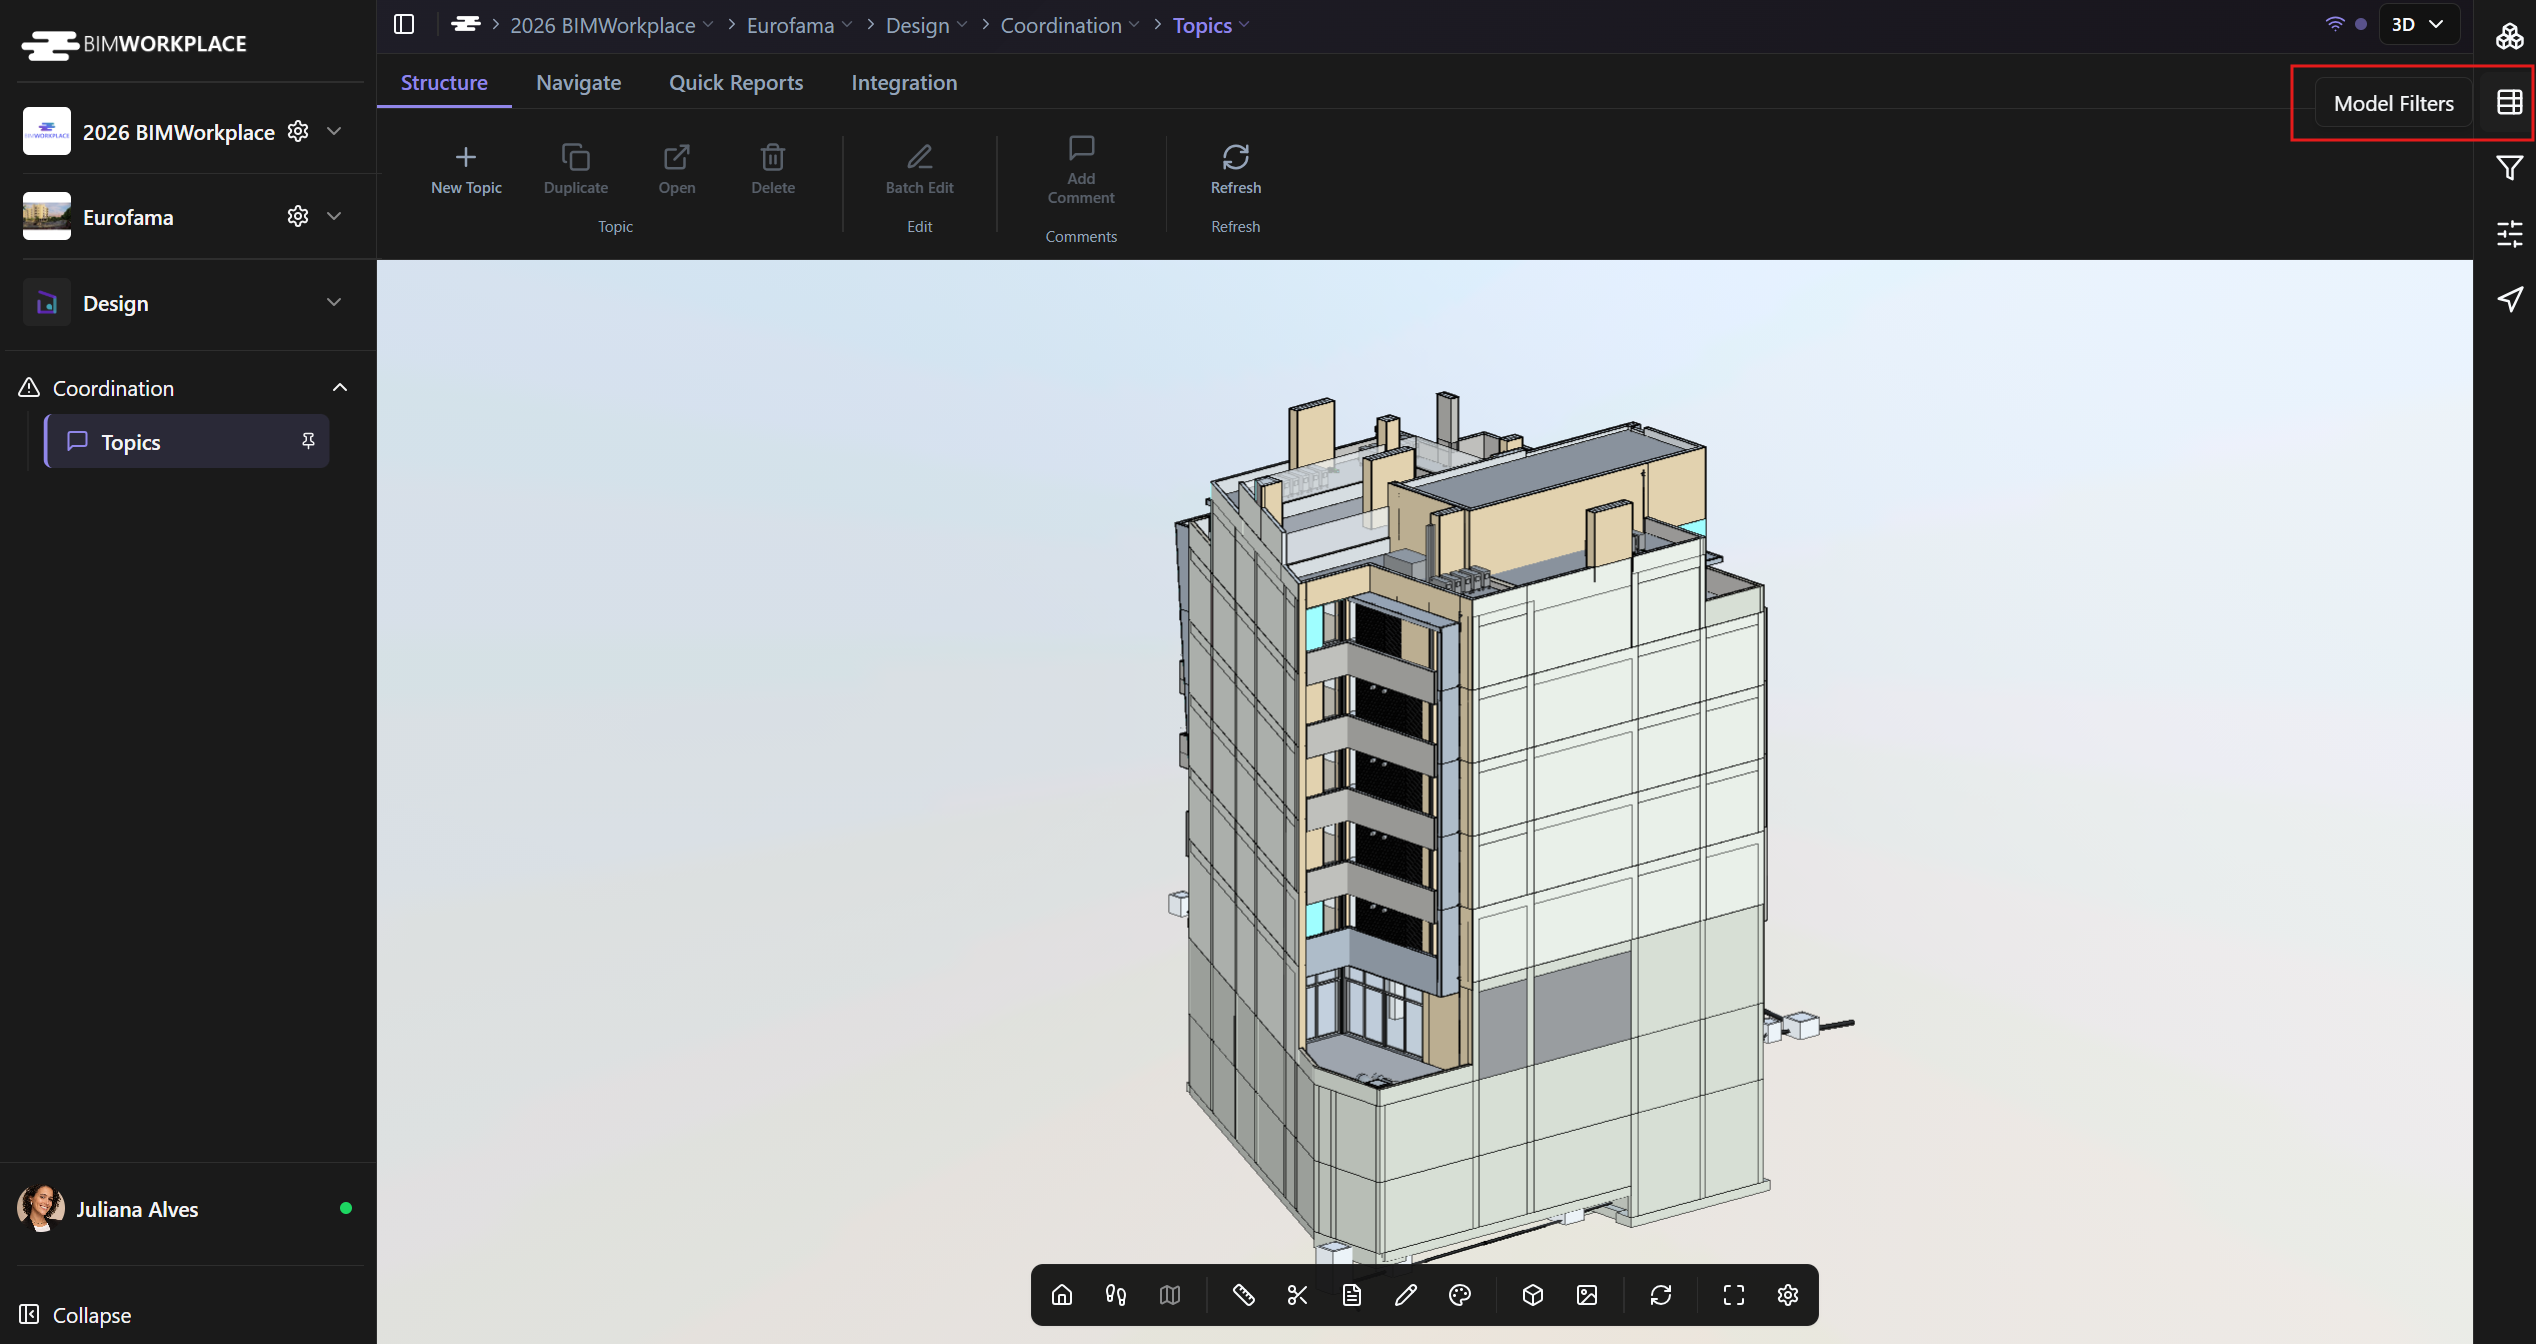
BIMWorkplace provides several types of model filters, each designed to help you isolate model information in a different way.
Hierarchical Filter
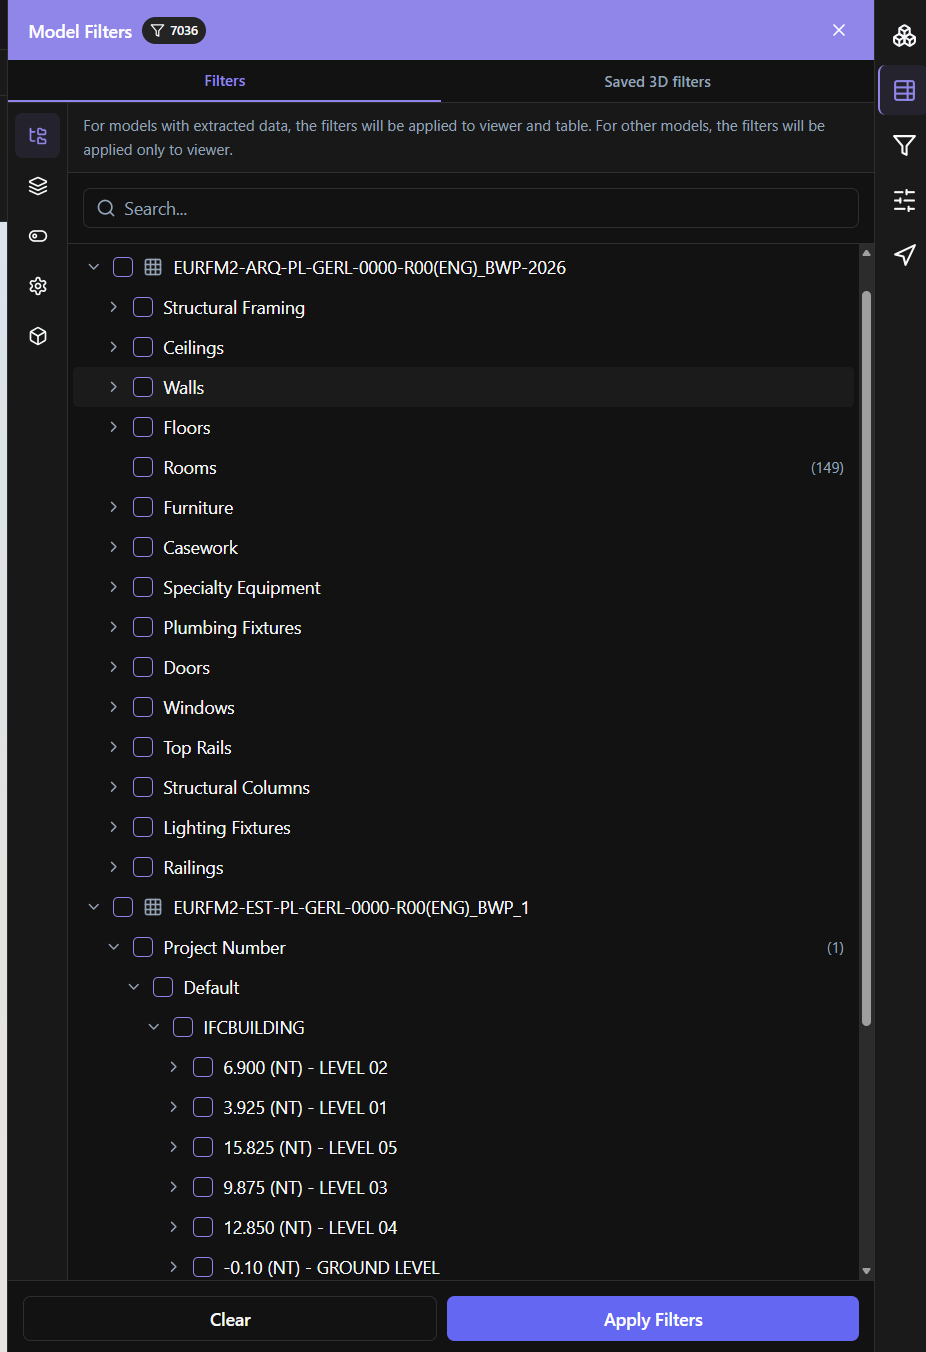
The Hierarchical Filter displays all active models from Models Management in a structured tree.
The hierarchy follows the structure of the original model authoring or coordination software.
- For Revit models, the hierarchy is organized by: Category > Family > Type
- For IFC and NWC models, the hierarchy is organized by level.
You can deselect specific categories, families, types, or levels, depending on the model format, then click Apply to update model visibility in the viewer.
This filter is useful for quickly isolating model components, disciplines, systems, or areas, such as walls, columns, furniture, ducts, or elements from a specific level.
Level Filter
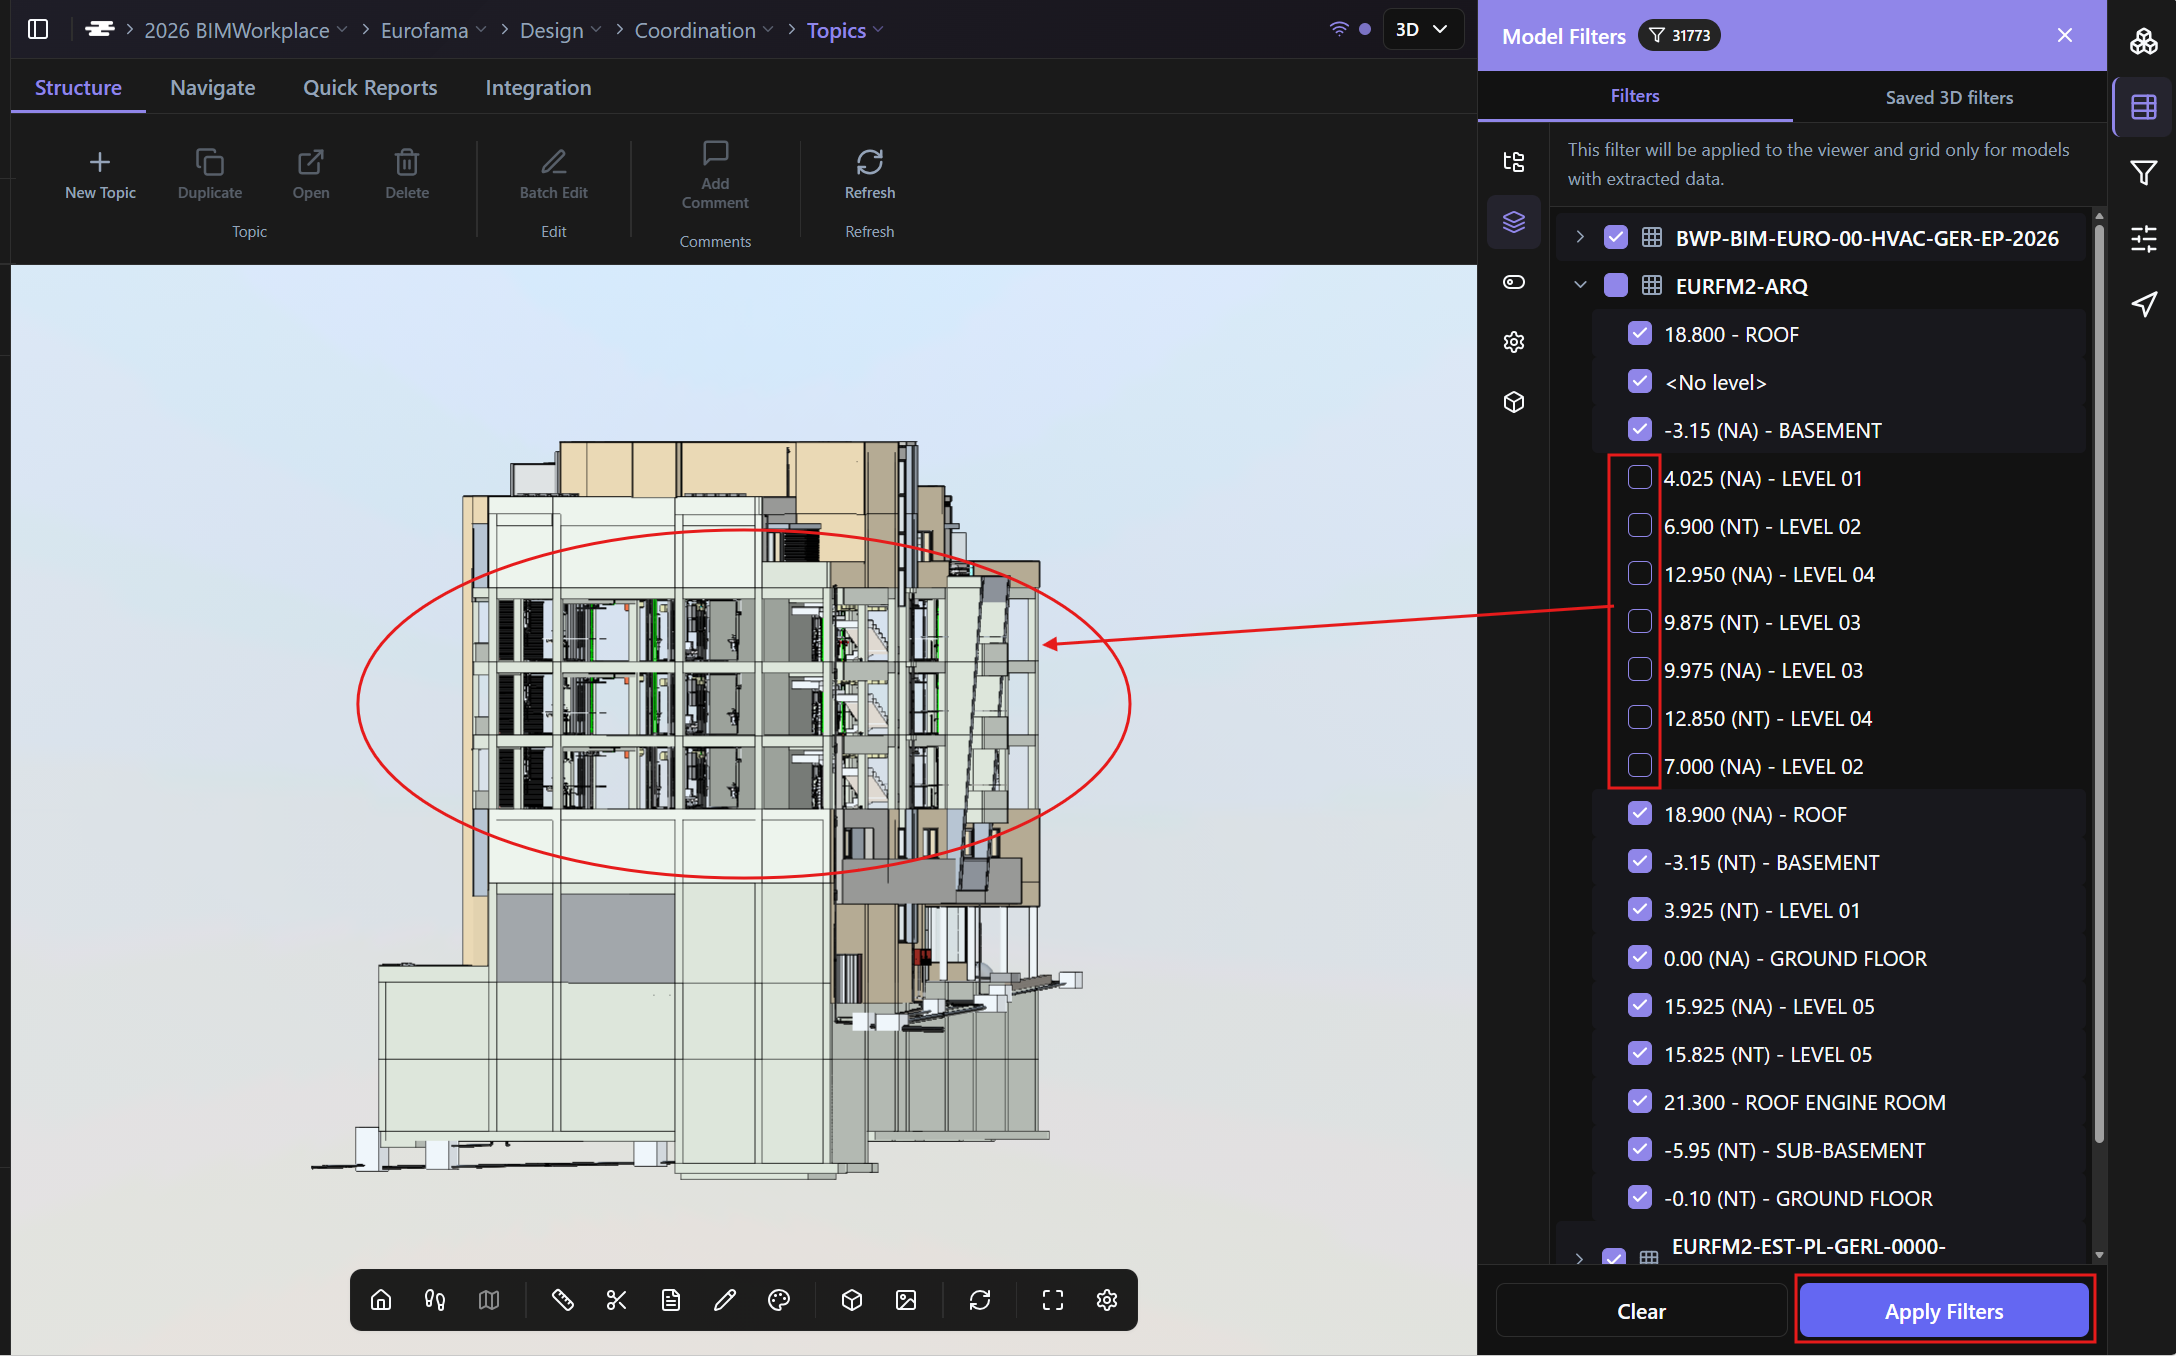
The Level Filter allows you to isolate elements based on the floors or levels defined in the active models.
Each level appears with a checkbox.
To apply a level filter:
Select one or more levels.
Click Apply.
The viewer updates the model visibility based on the selected levels.
Manual Filter
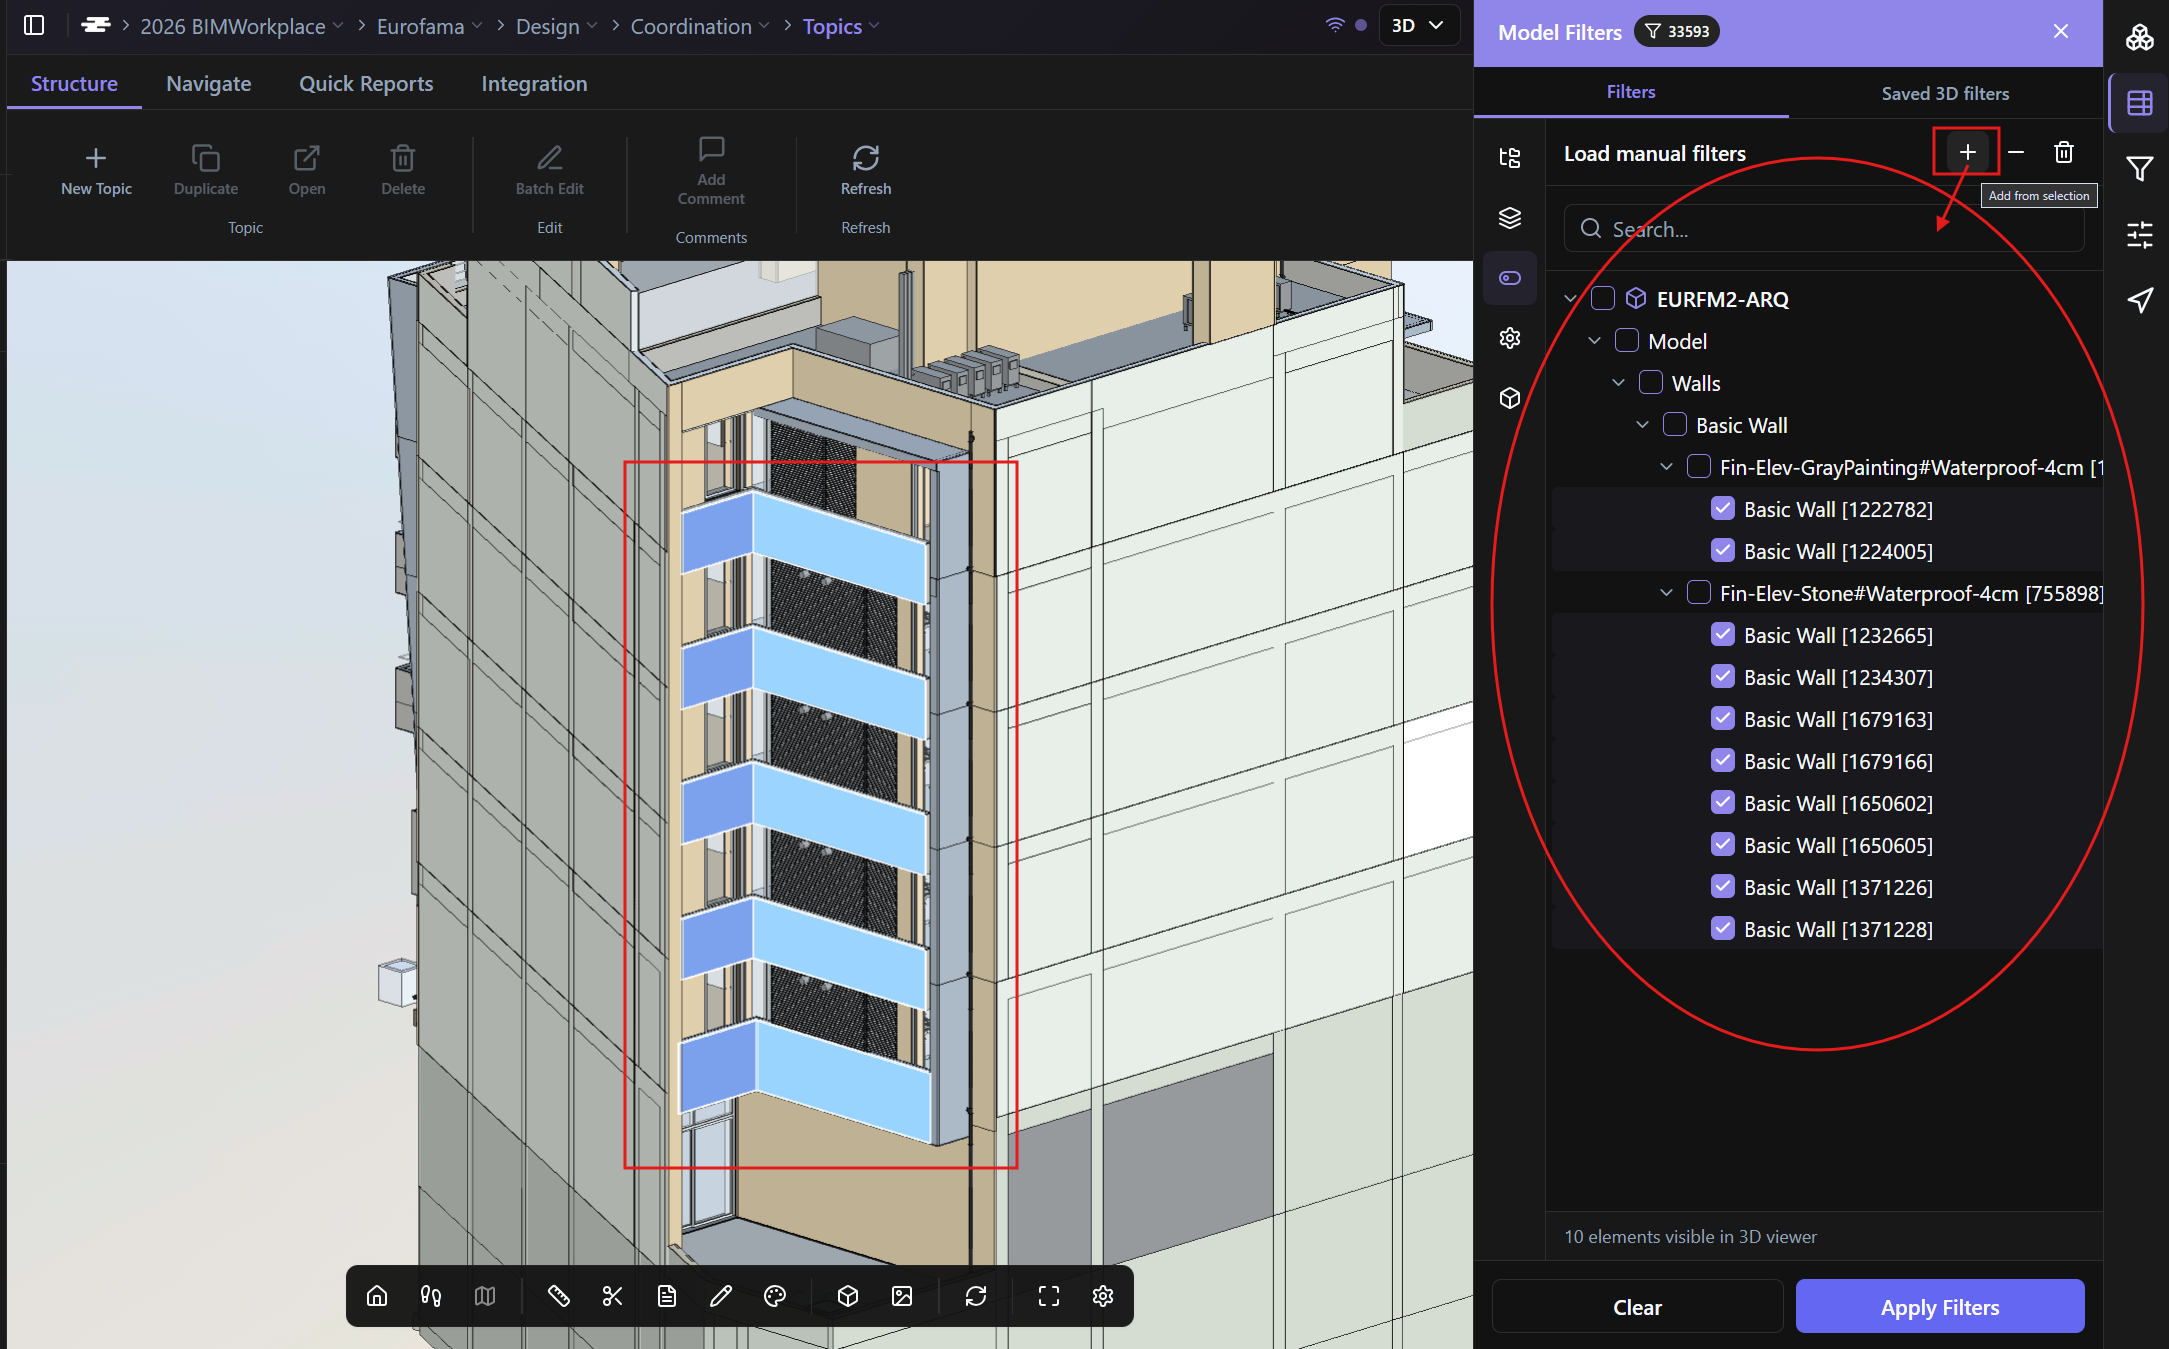
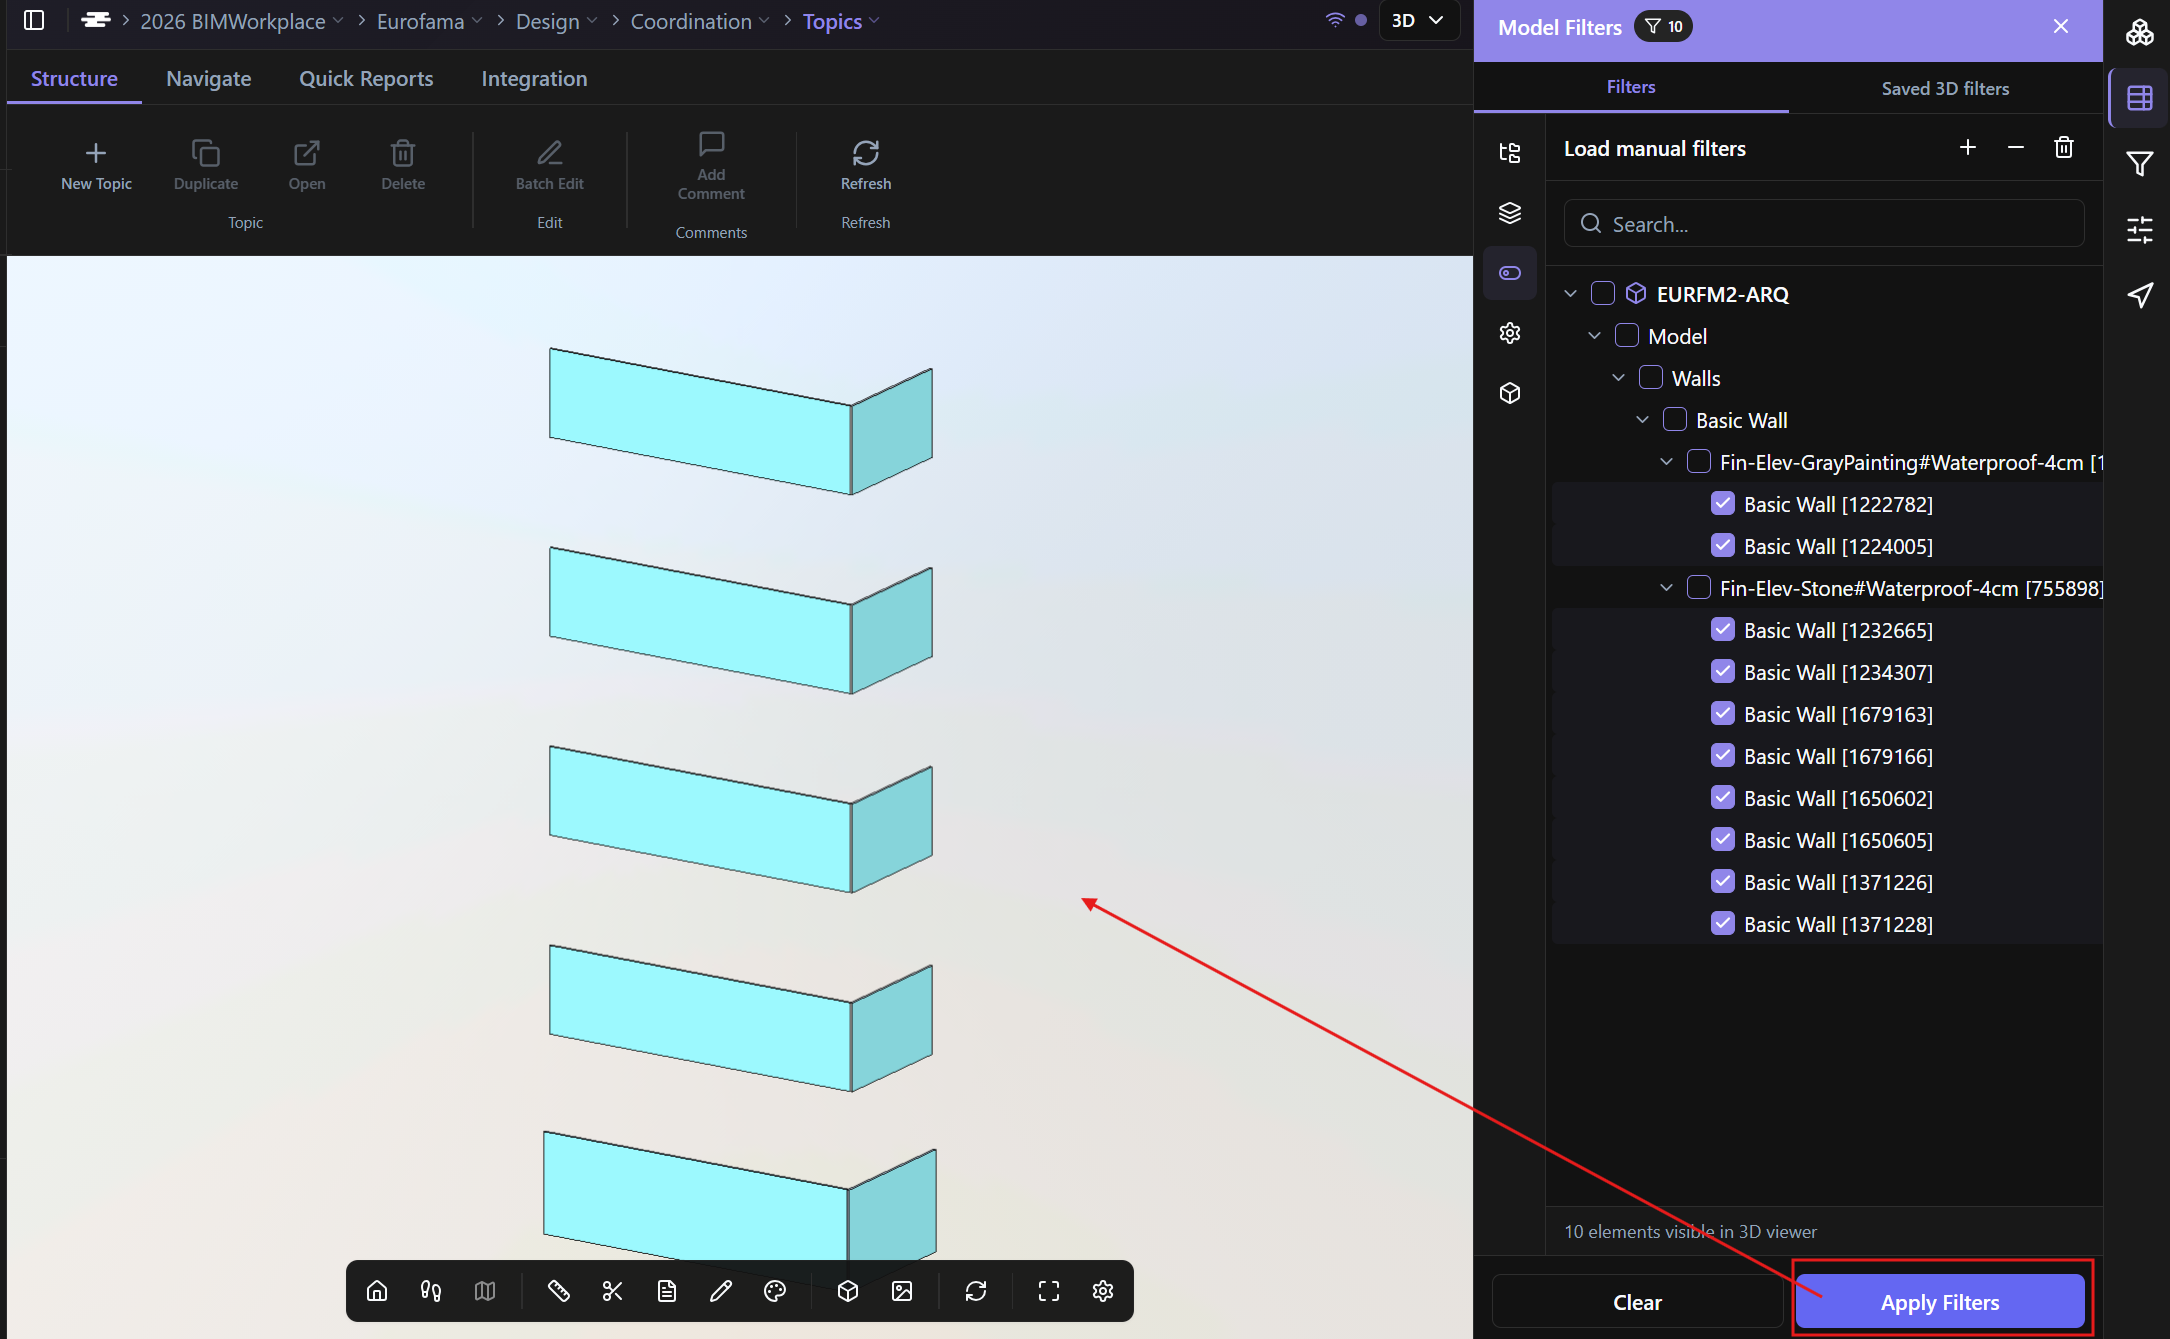
Use the Manual Filter to create quick filter conditions based on elements selected directly in the viewer.
This is useful when you need to isolate specific components, repeated geometry, or areas that are easier to select visually than to identify through properties.
[Screenshot: Viewer with one or more model elements selected.]
To use the Manual Filter:
Select one or more elements directly in the viewer (use Shift to select multiple elements).
Click (+) Add from Selection to record the selected elements.
Click Apply to filter the model based on the selected elements.
Custom Filter
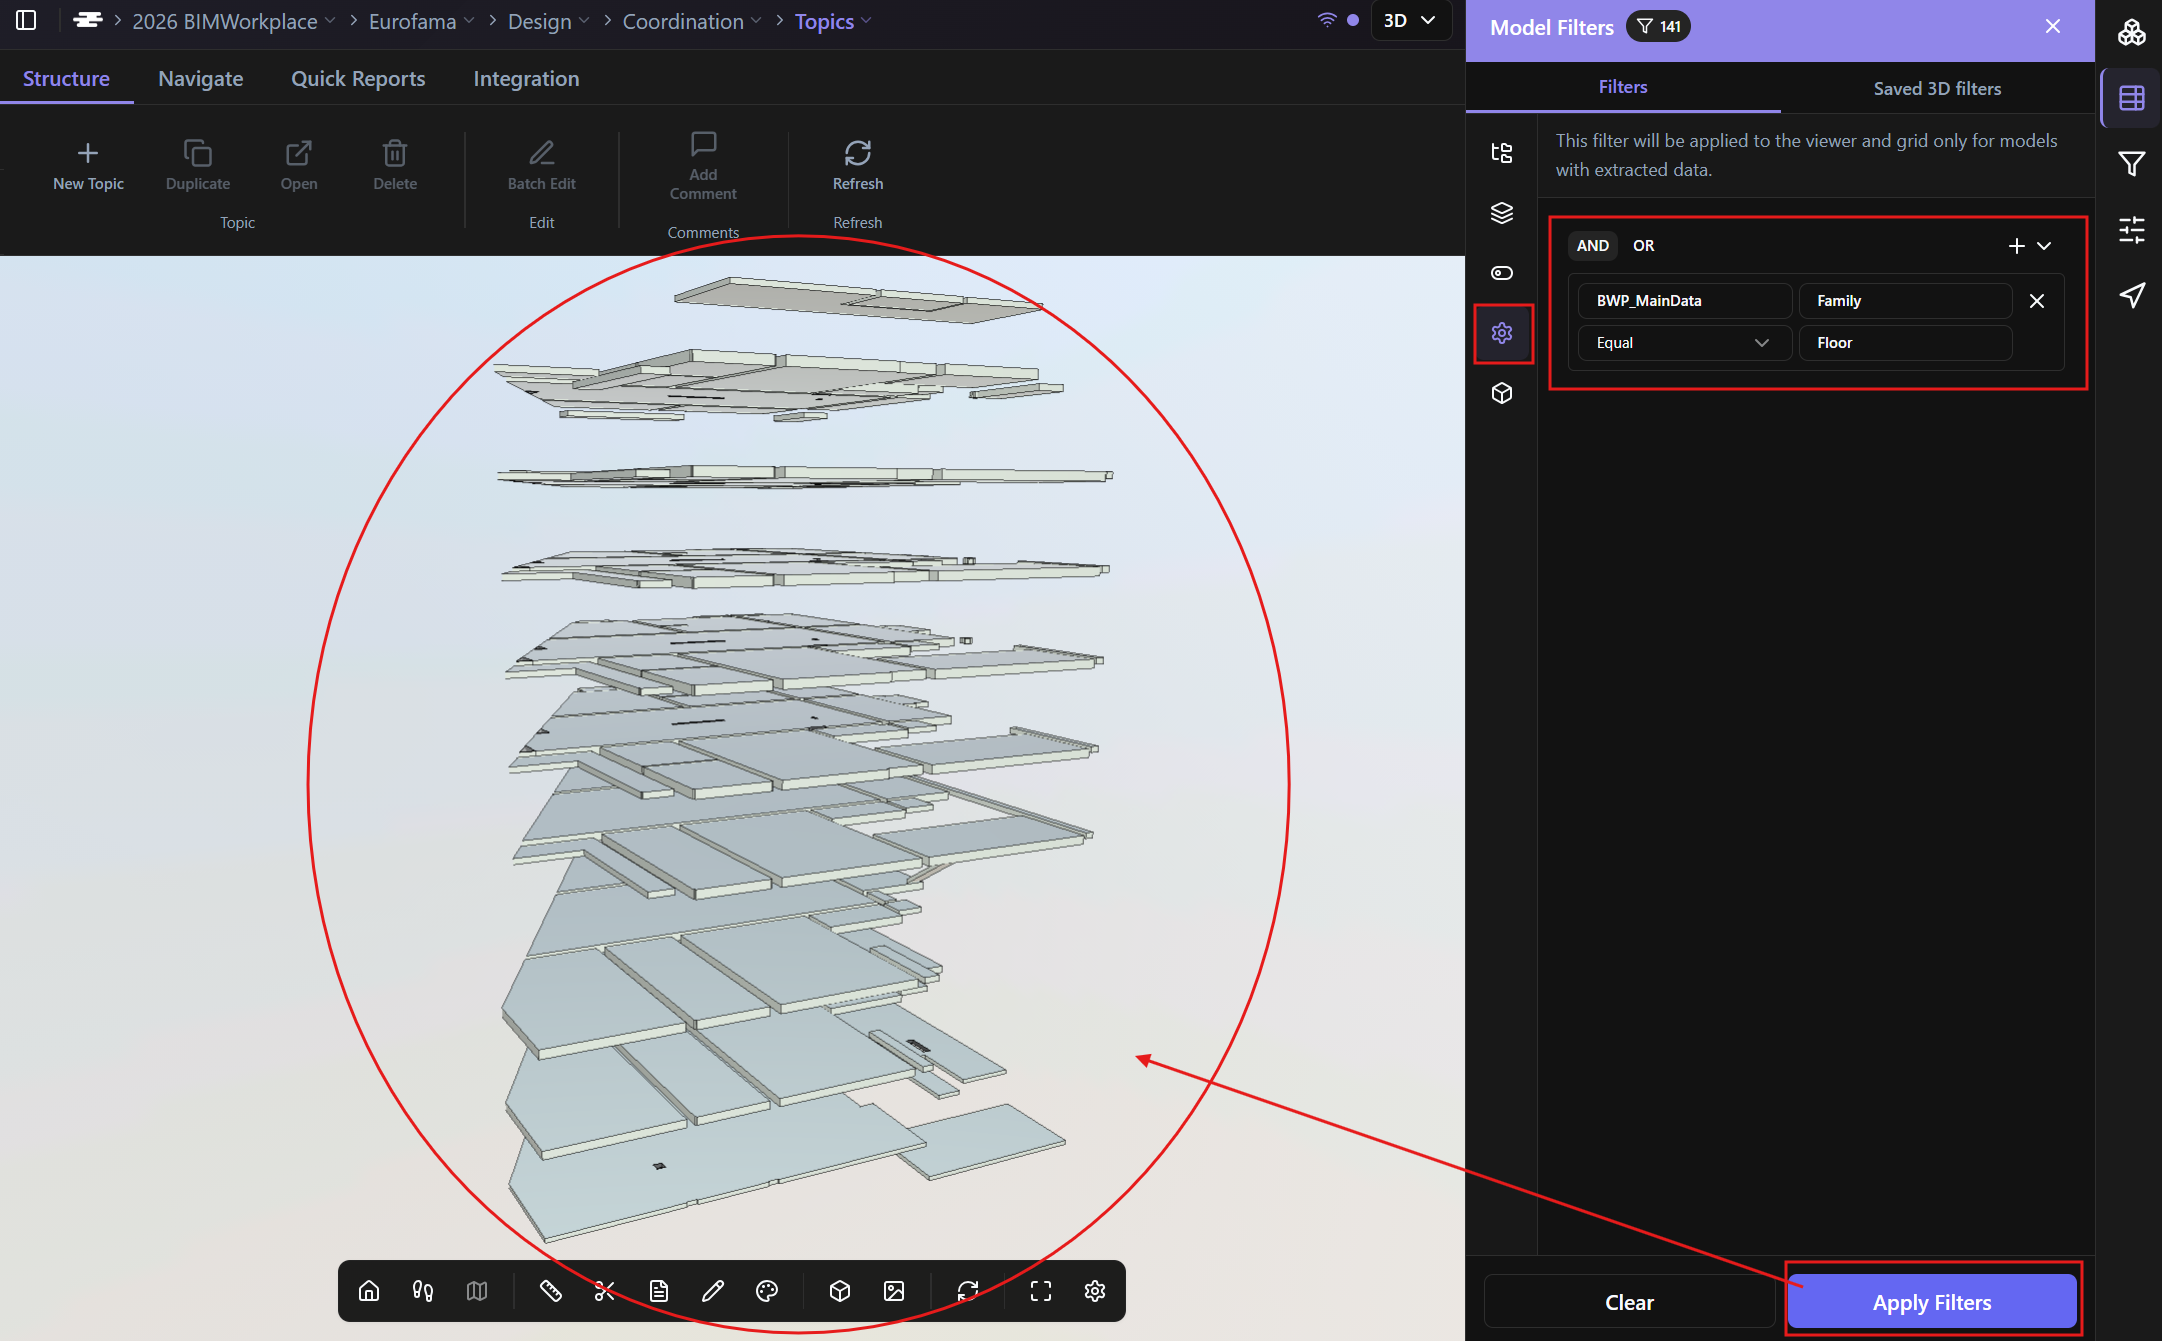
The Custom Filter allows you to create detailed filter conditions using model properties.
Use this filter when you need to isolate elements based on metadata, such as family name, level, material, type mark, system, discipline, or any available model property.
Adding a custom filter
To add a custom filter:
1. Click Add Condition to open the rule box
2. Select the property set and property you want to use as the basis for the filter, such as BWP_MainData > Family
3. Choose how the selected property should be evaluated.
a. Available conditions include:
i. Equal
ii. Not equal
iii. Contains
iv. Starts with
v. Ends with
4. Enter or select the value to compare against the chosen property.
5. Click Apply to filter the model based on the rule.
Creating complex filters
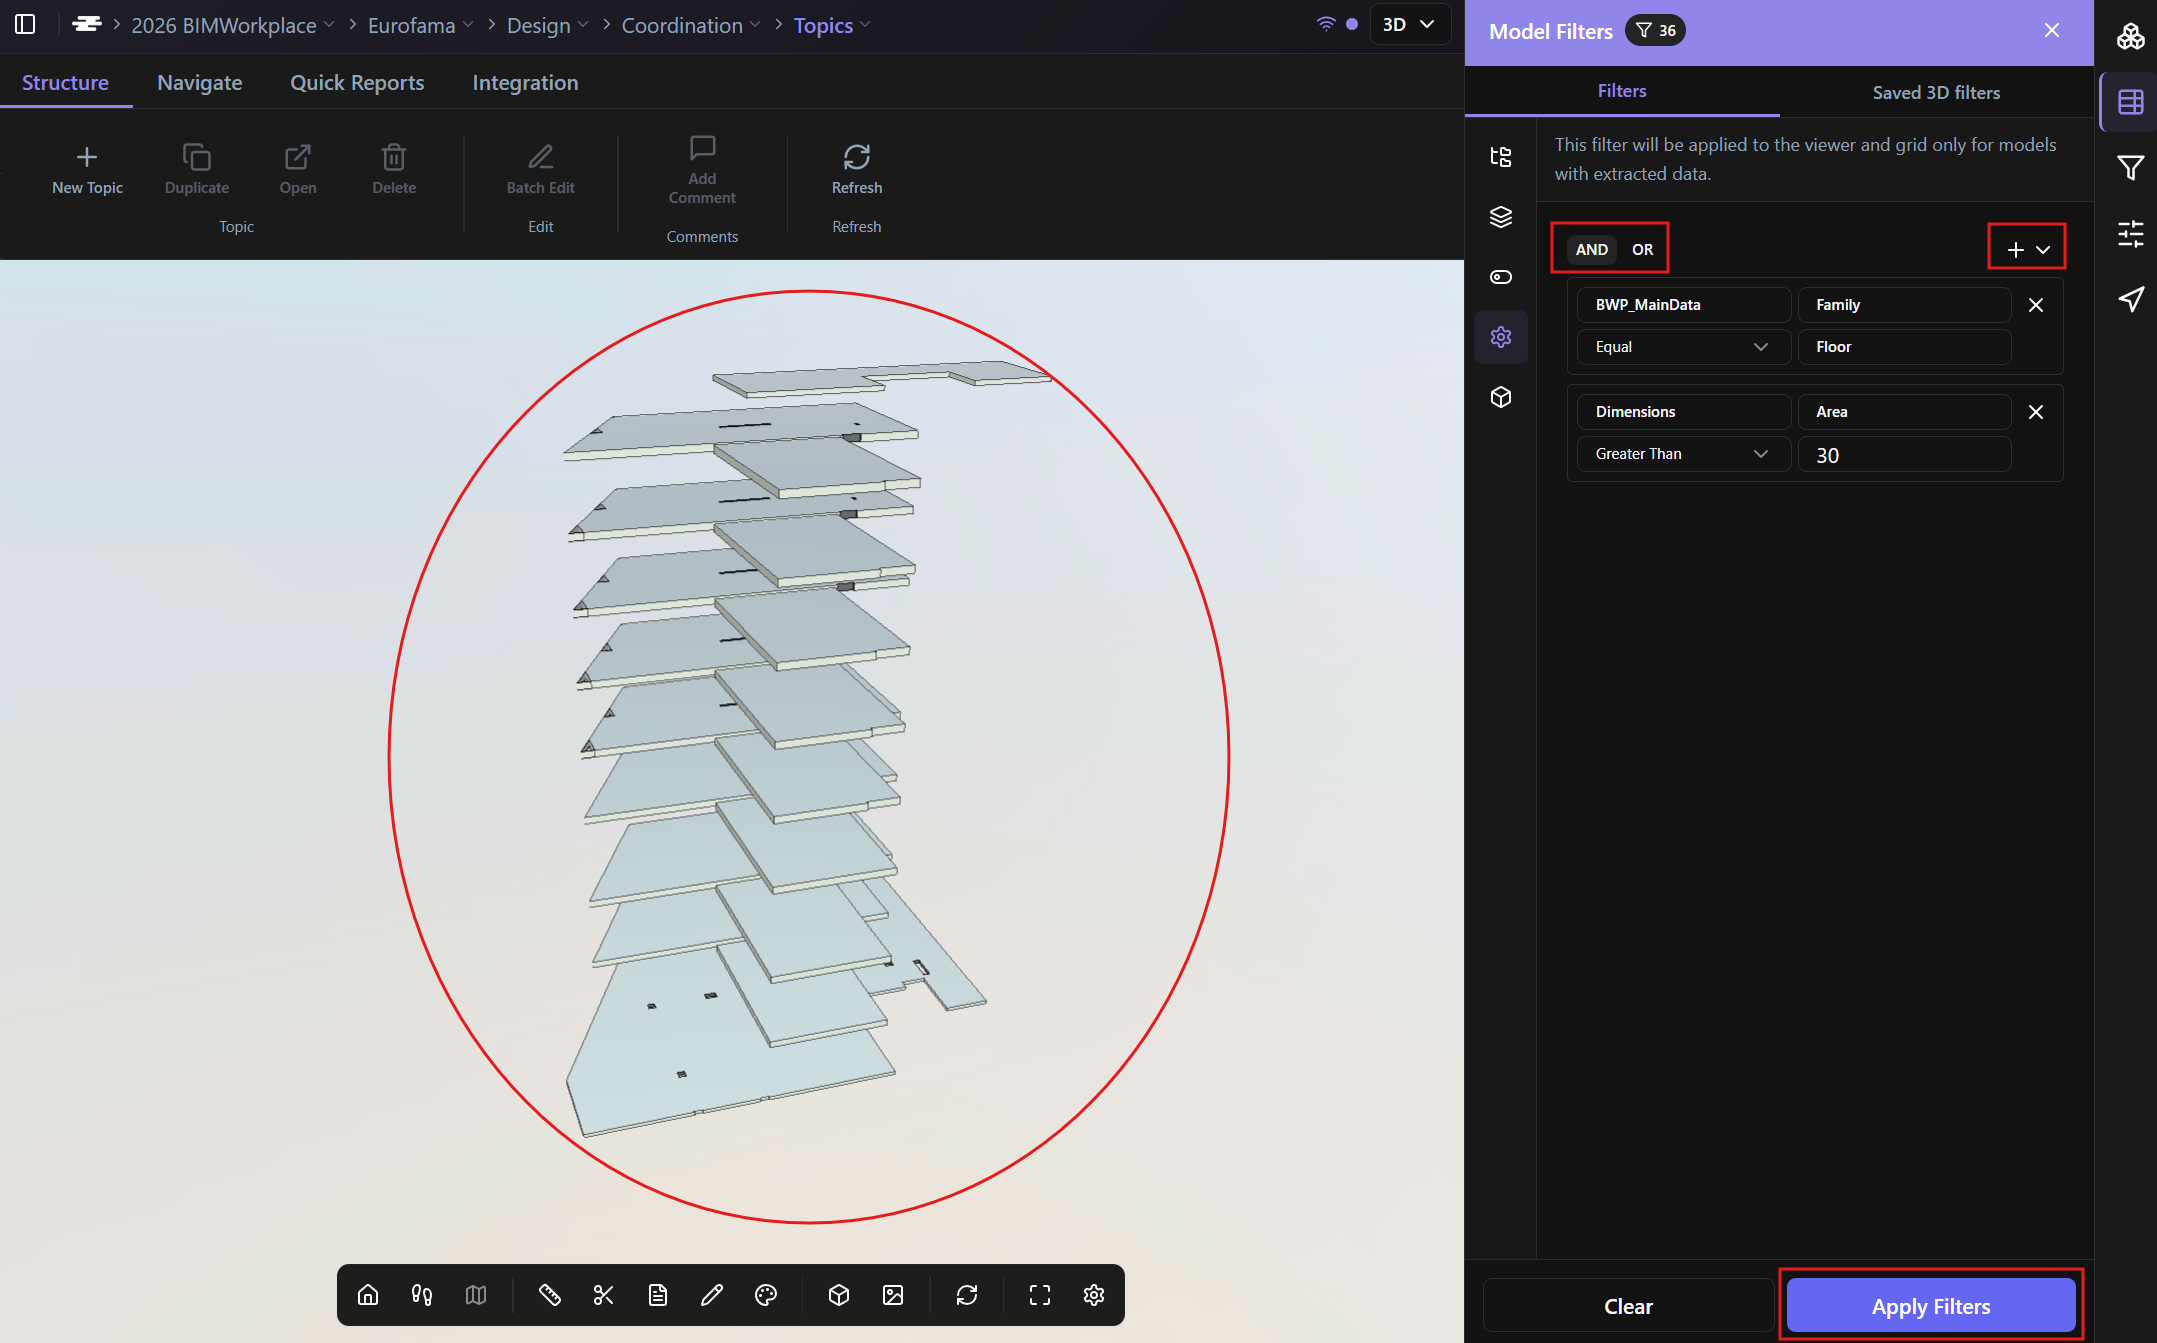
Custom Filters can include advanced logic using multiple conditions and groups of conditions.
You can build complex filters by:
1. Adding additional conditions by clicking + Add Condition
2. Adding groups of conditions
3. Choosing a logical operator:
a. AND — all conditions must be true
b. OR — any condition may be true
3D Views Filter
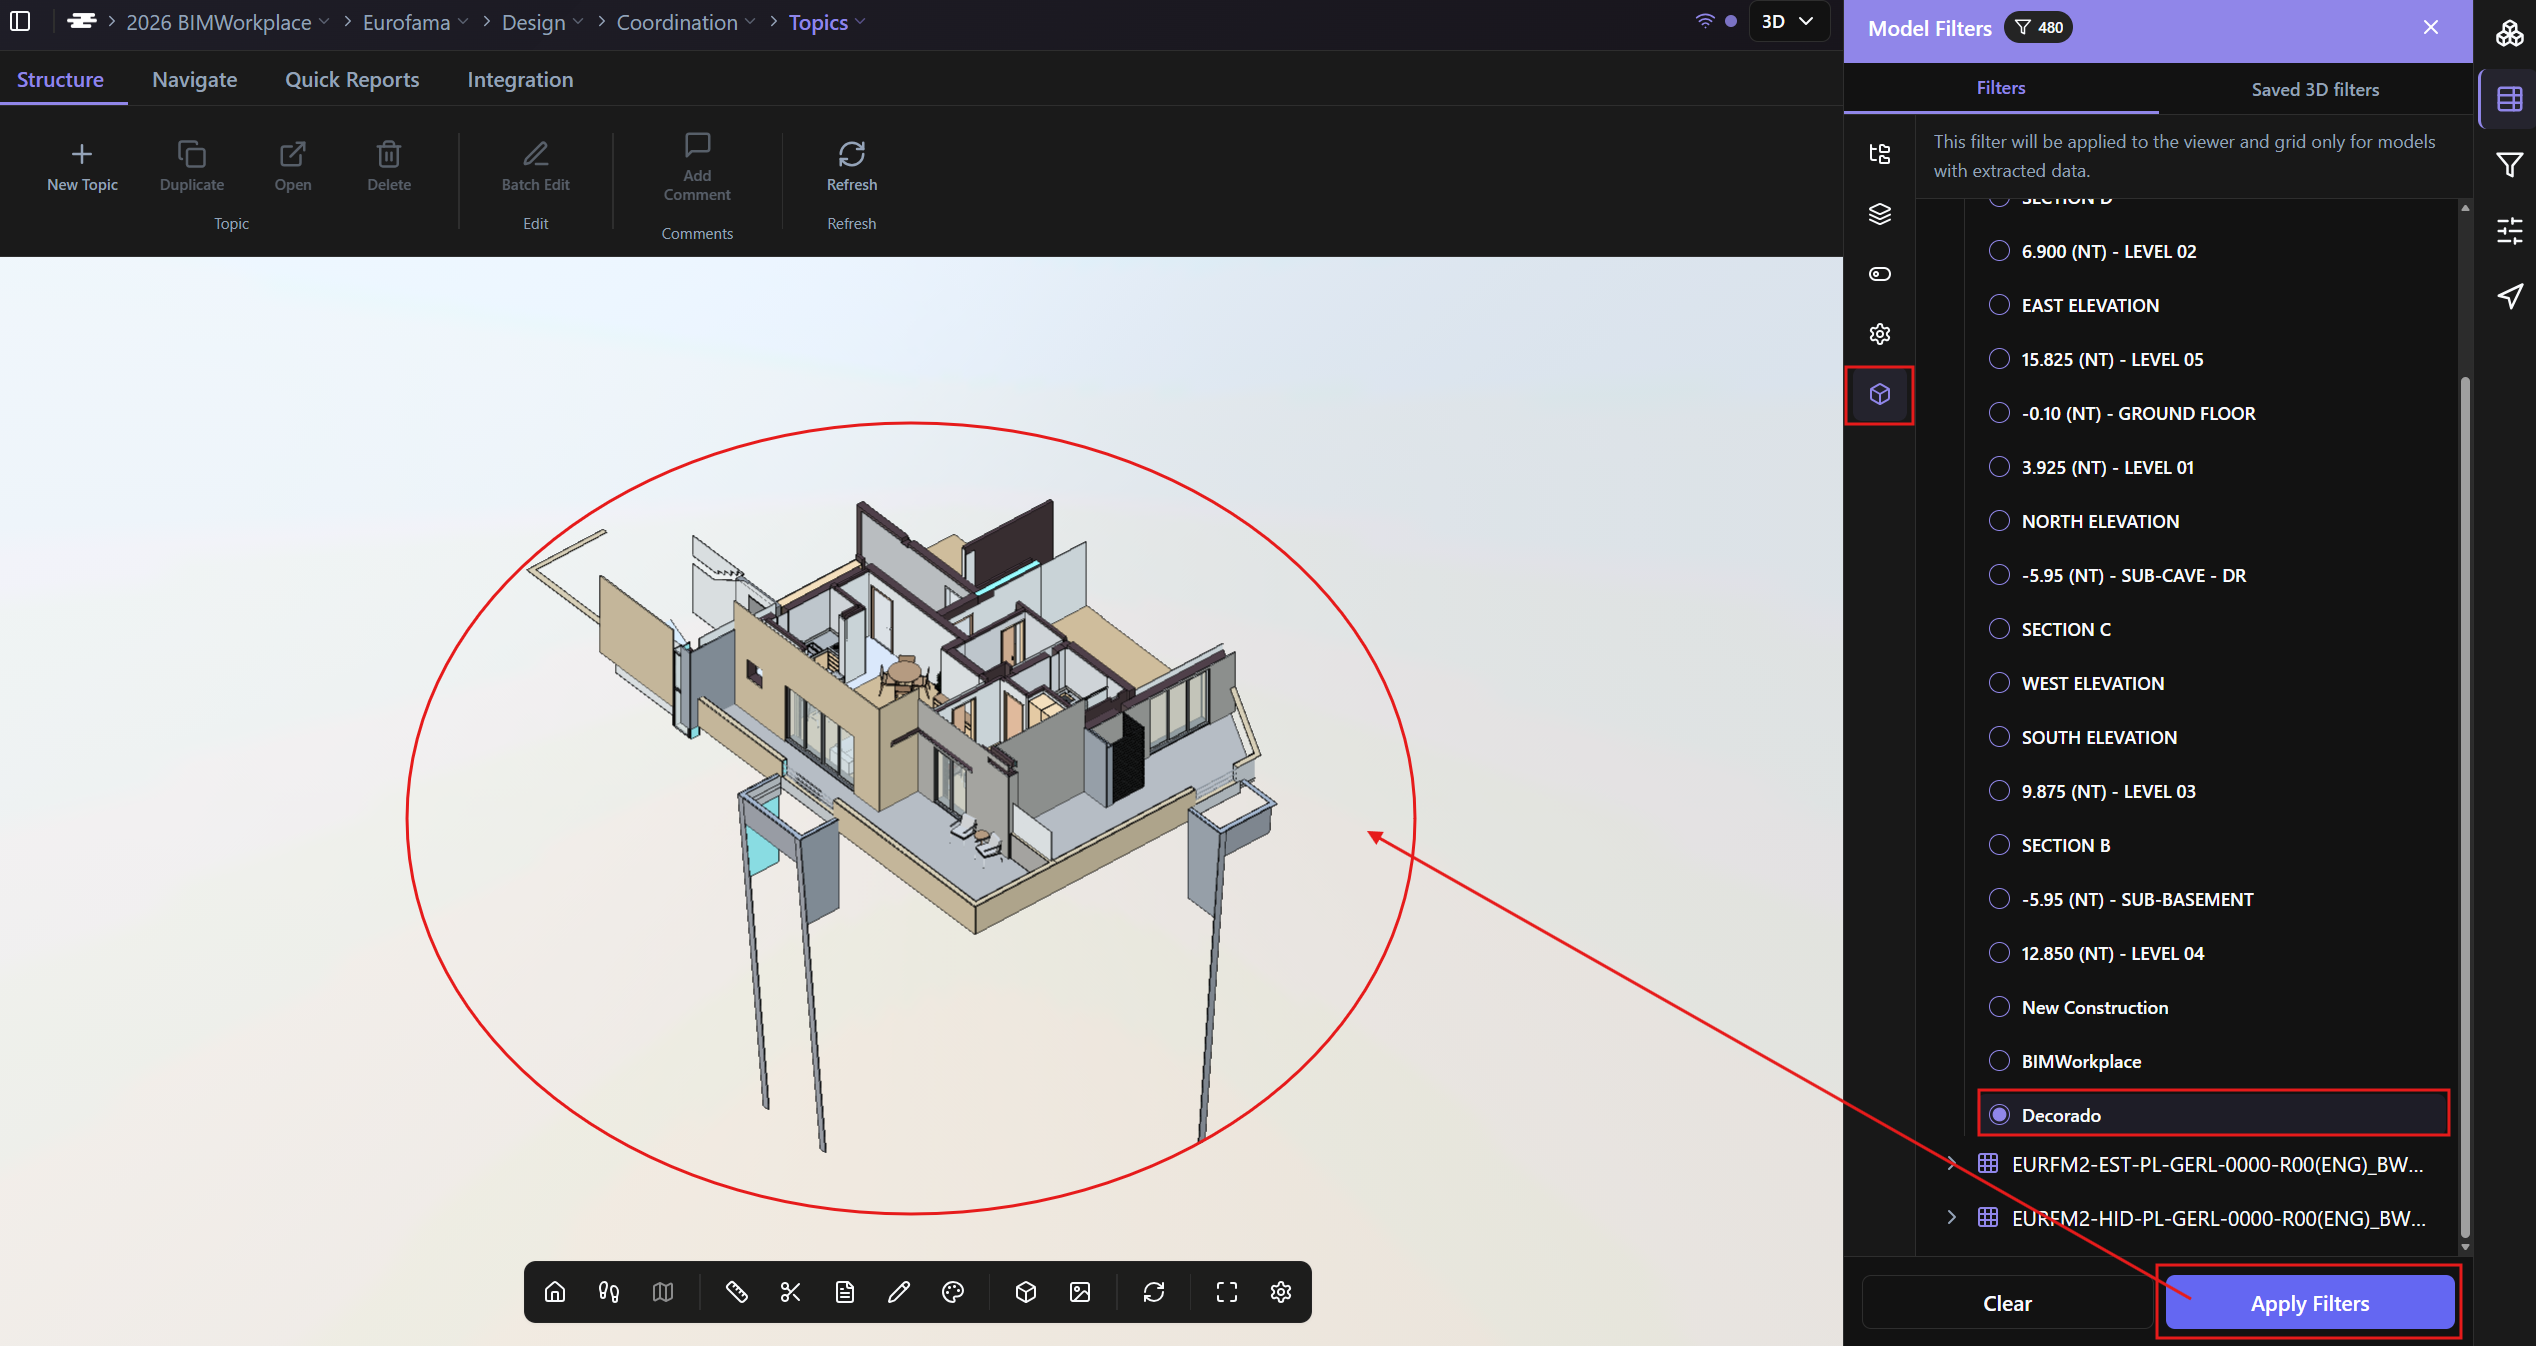
When you upload a Revit model using the BIMWorkplace Revit Plugin, the model is exported with the views selected in Revit’s Publish Settings.
In the 3D Views tab, you can choose one of these views for each uploaded model.
When a view is selected, the viewer applies the visibility settings associated with that Revit view.
This is useful when different coordination views, discipline-specific views, or presentation views were already prepared in Revit before upload.
Saved Filters
After applying filters to the model, you can save that configuration as a Saved Filter for quick reuse.
This is useful when you frequently need to return to the same filtered model view, such as a discipline-specific view, a level-based view, or a coordination view for a specific area.
Creating a saved filter
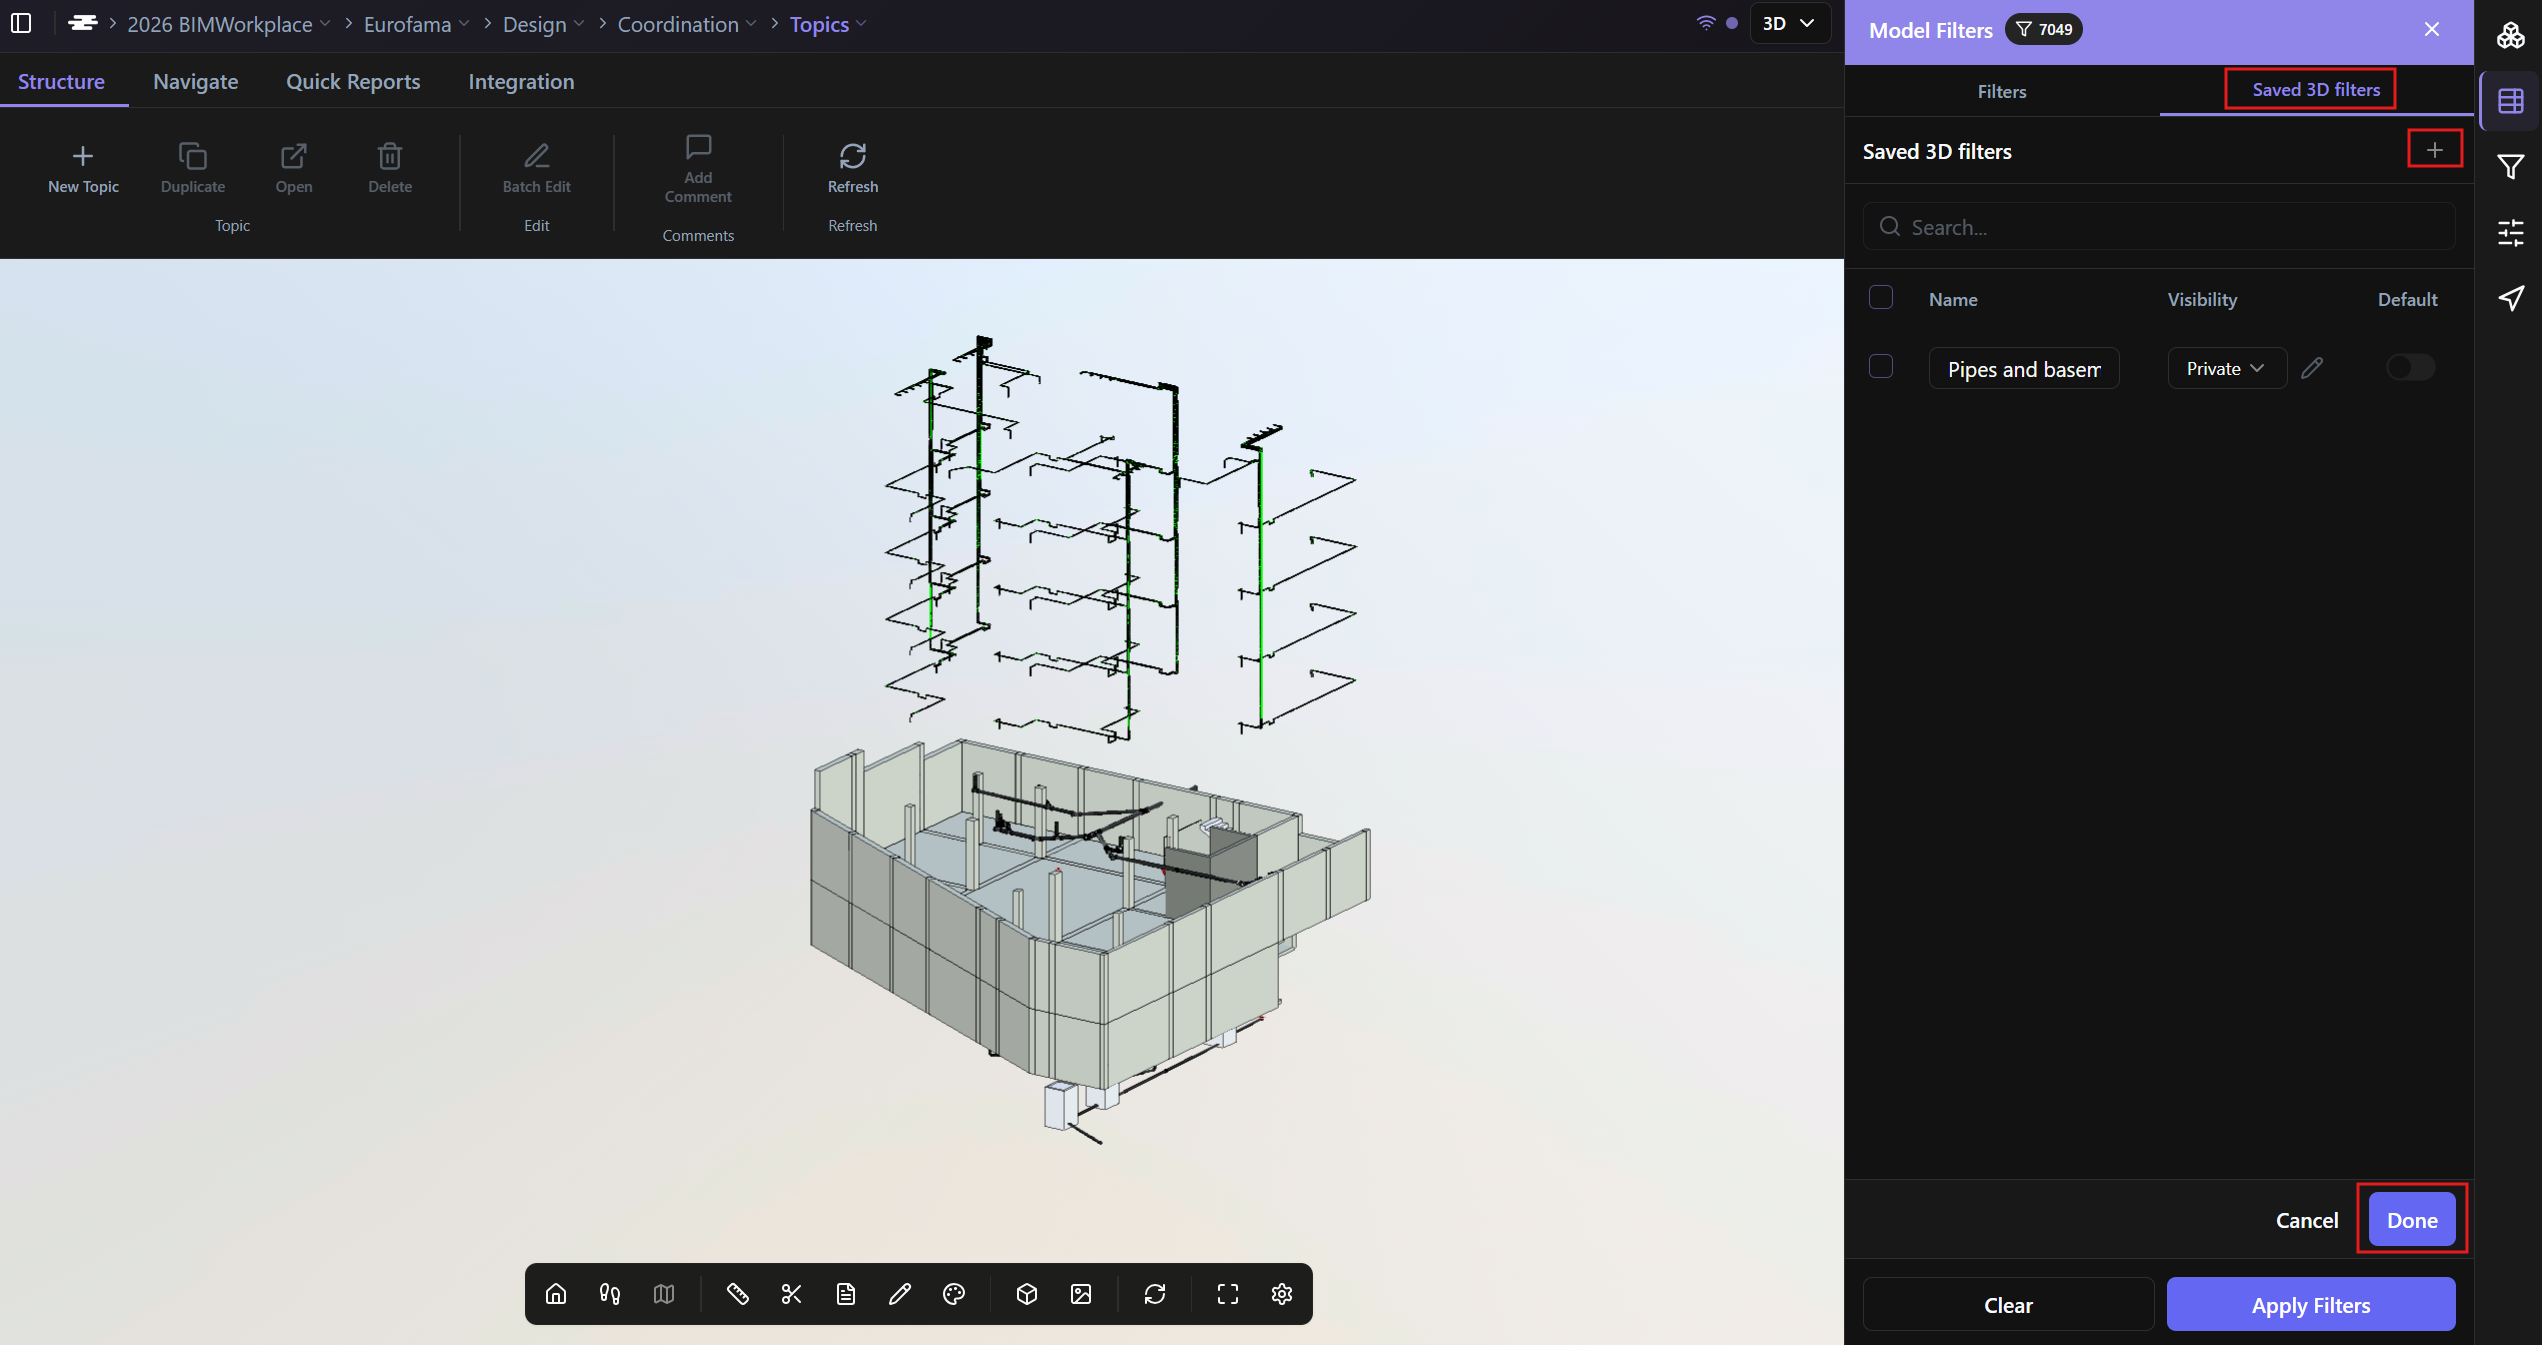
To create a saved filter:
Apply the filters you want to use.
Open the Saved 3D Filters tab.
Click (+) Add.
Enter a name for the saved filter.
Define whether the filter will be public or private.
· Private filters are available only to you. Public filters can be used by other users with access to the project.
Click Done to save.
Setting a filter as default
When saving a filter, you can define it as the default filter.
If a saved filter is set as default, it will be automatically applied every time you open the viewer.
This is especially useful in large projects, where models may take longer to load. By setting the most relevant filtered view as default, each user can open the viewer directly with the model context that matters most to their work.
Applying a saved filter
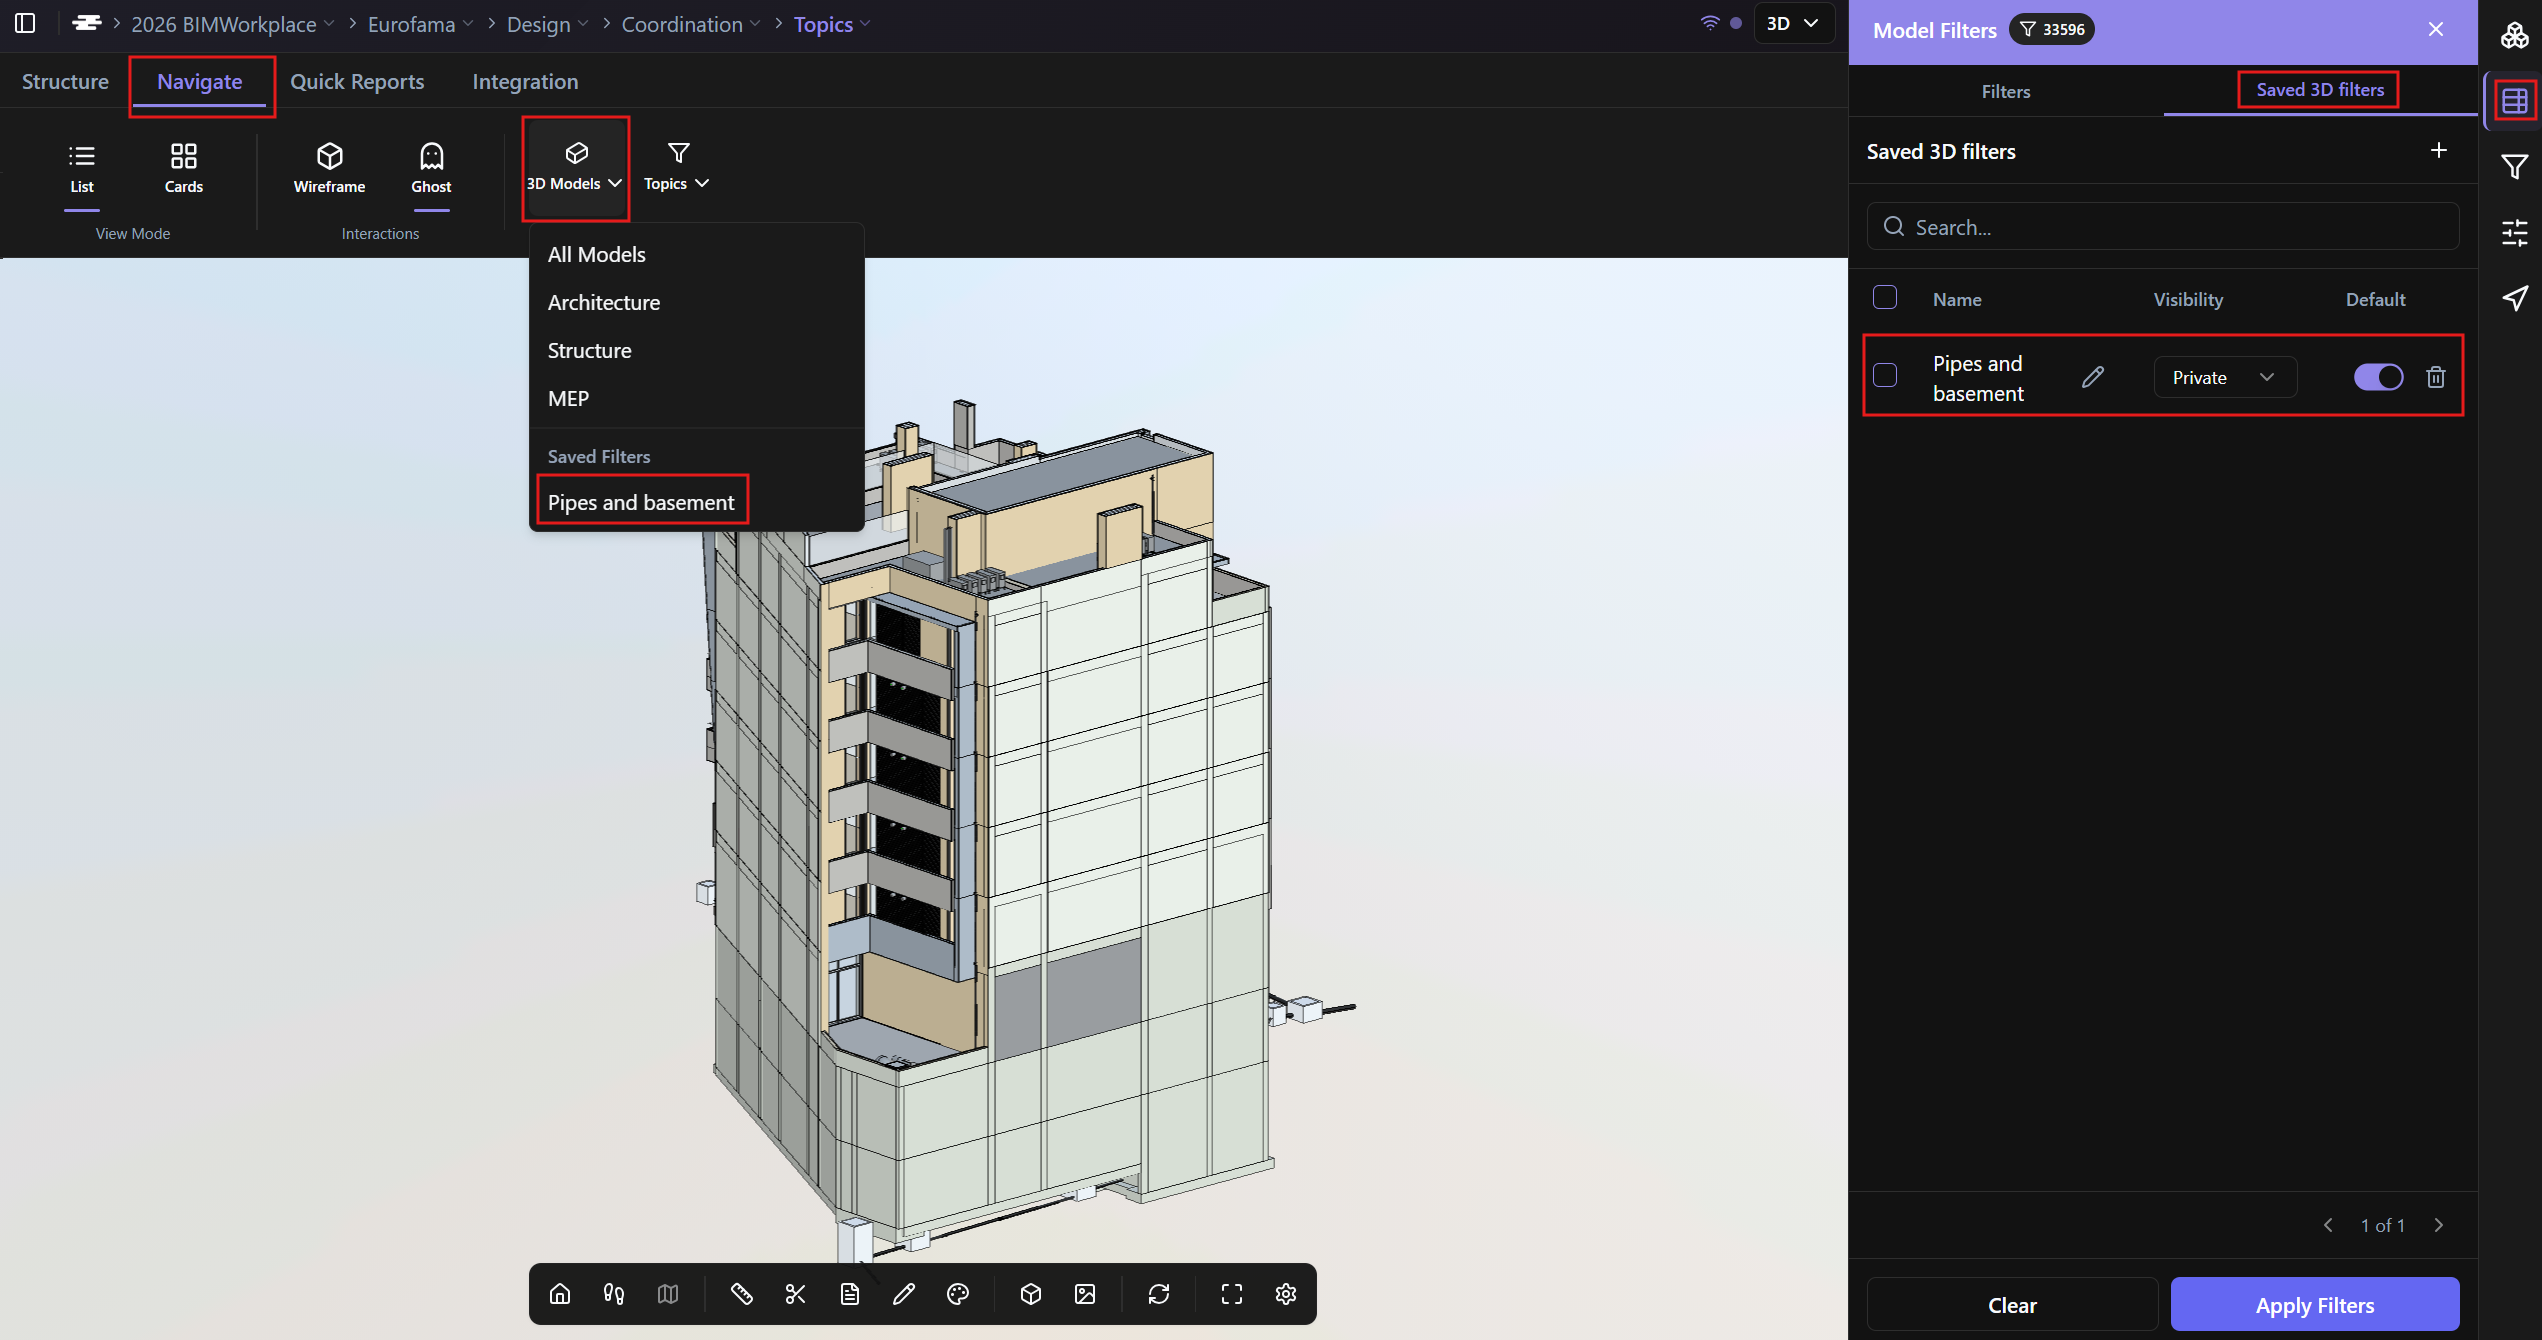
Saved filters can be applied in two ways:
From the Saved 3D Filters tab in the filter panel.
From the Navigate tab in the ribbon, by selecting the filter from the 3D Filters dropdown.
Was this article helpful?